Manage Business Level Settings
Last Modified on 03/20/2025 8:34 am EDT
Settings are created and managed at both the Business and Site level. An Owner has the permissions to manage both levels, and an Administrator has permissions to manage the site they are assigned to when they are added as a Team Member.
Business Level Settings
Go to Settings (left menu) to access the Business Settings card. Use the following links on the Business Settings card to assist with business settings:
|
View Settings
|
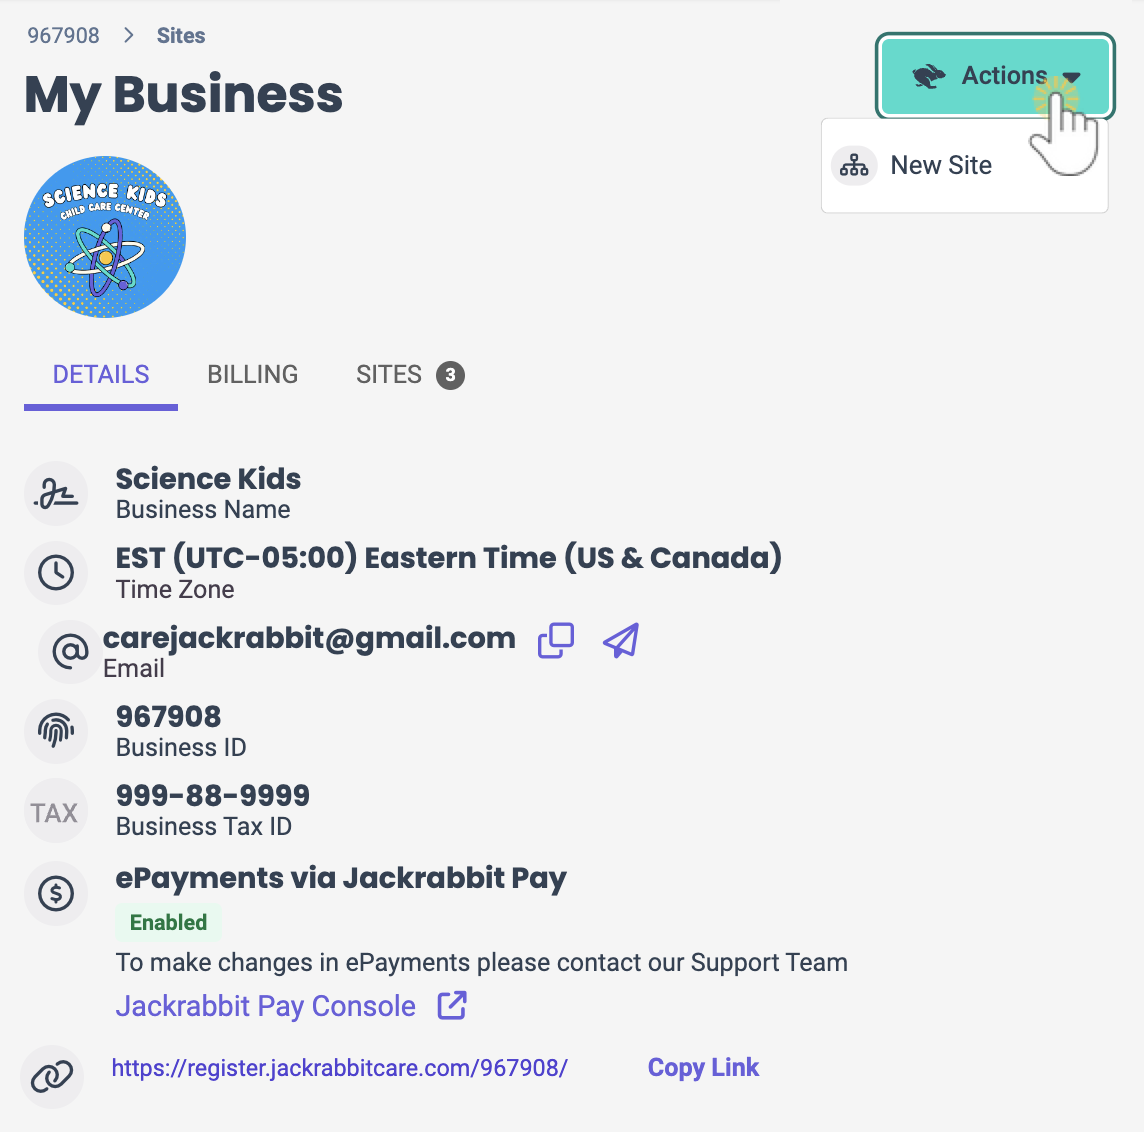
The View Settings link opens the My Business page with three tabs:
- Details - Most of the information on the Details tab is set up for you when Jackrabbit creates the account. This includes Business Name, Time Zone, Email, Business ID, and Business Tax ID. Time Zone, Email, and Business Tax ID are active links and can be updated. An Online Registration link is added when an Online Registration form is created for the Programs in the account. If you are using Jackrabbit Pay, a link to your Jackrabbit Pay console can be found here as well.
- Billing - Initial profiles set up as the defaults for your business include Weekly and Monthly and are displayed on separate cards. These can be edited as long as they are not in use.
- Sites - Jackrabbit adds a site to start the account. Click the Expand icon
 to show the address, phone number, and hours of operation for each site. When a site is added to the system, the Open now or hours of operation for the site can be added. The times can be updated at the site level on the Details tab. to show the address, phone number, and hours of operation for each site. When a site is added to the system, the Open now or hours of operation for the site can be added. The times can be updated at the site level on the Details tab.
- Actions - Use the Actions menu
 to add a New Site. to add a New Site.

|
|
Manage Billing Profile
|
This quick link opens the My Business page with the Billing tab selected. Each Billing Profile is shown on a separate card: Weekly, Monthly, and Bi-Weekly. If not in use, these can be edited.
|
Manage All # Sites
|
Depending on the number of sites you have for the business, all the sites will display on the My Business page with the Sites tab selected.
|
|
Manage Kiosk Settings
|
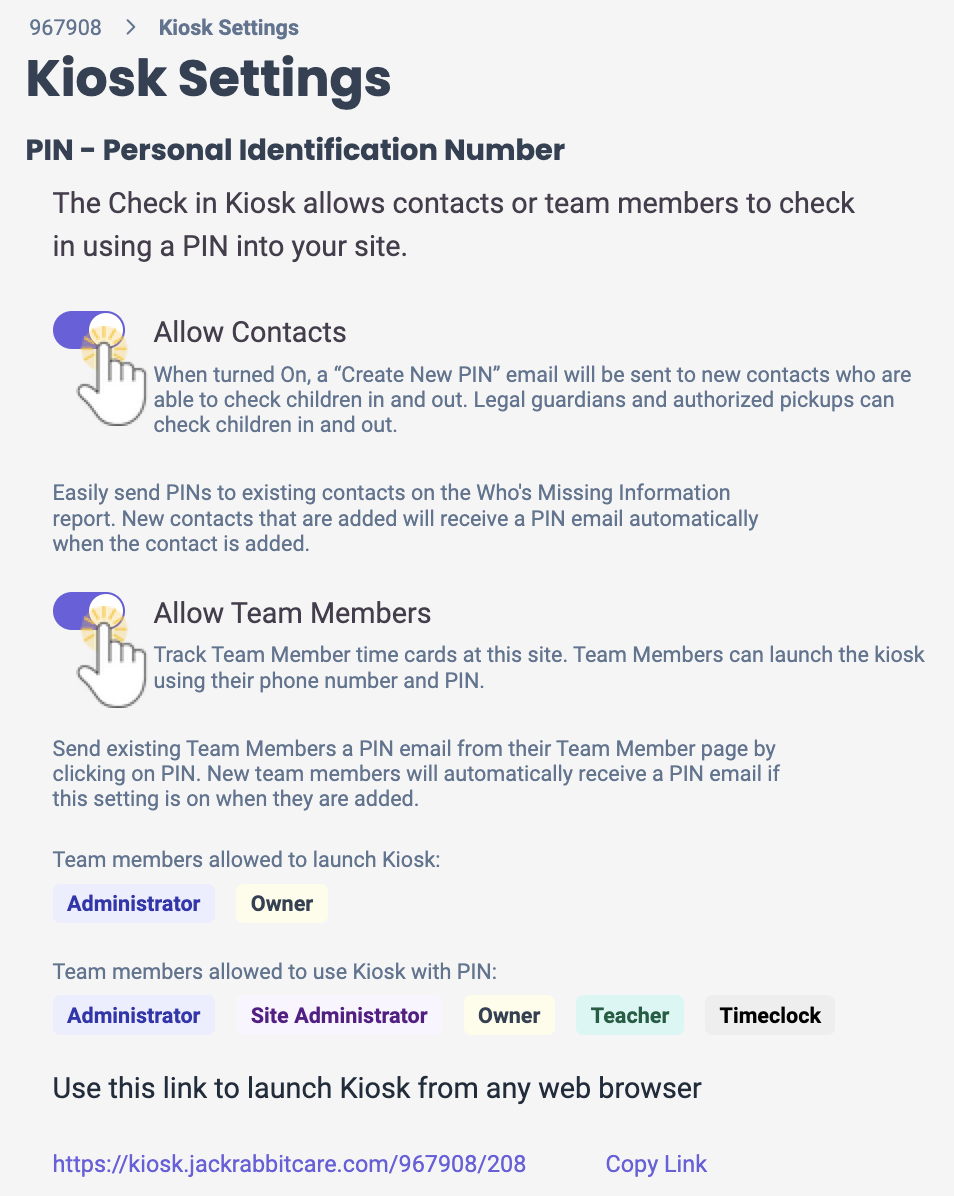
The Manage Kiosk Settings link opens the Kiosk Settings page. This page allows you, as the Owner, to control who will receive an email to set a PIN to use the Kiosk.
Note: Enable these settings before adding new Contacts or Team Members.
- Allow Contacts - Slide the toggle to the right, and a new contact will be sent an email to create a PIN. This includes contacts designated as Legal Guardians and/or Authorized Pickups.
- Allow Team Members - Slide the toggle to the right, and a new team member will be sent an email to create a PIN. A Team Member will be able to launch the Kiosk using their phone number and PIN.
Note: This setting will be enabled automatically when an account is created by a business owner.
Refer to Launch and Use the Kiosk for additional information.

|
| Manage Policies |
Create policies in the Business Settings area so they are accessible when creating Online Registration forms for the Programs in your organization.
Refer to Create & Manage Policies for additional information.
|
To add additional sites to the account from any tab on the Business Settings card, use the Actions menu > New Site.
 > New Site.
 to add a


