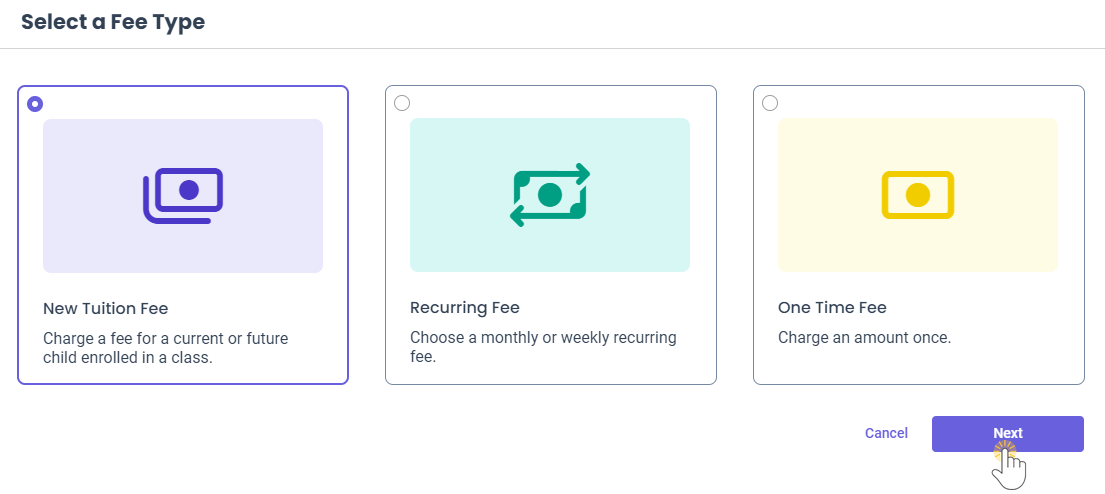
There are three options to consider when adding a fee to a family account: New Tuition, Recurring, or One Time Fees.
New Tuition or Recurring Fees - Once set up, a New Tuition or Recurring Fee is automatically invoiced to a family on their invoice date. Examples of these fees include:
- Weekly or monthly child tuition.
- Monthly supply or meal fees.
One Time Fee - This fee is charged only once, either at the time of the Payer's regular invoicing or immediately upon request. Examples of One Time fees include:
- A fee for a field trip.
- A fee for children's photos.
Add a Fee From a Family Account
You can add a New Tuition Fee, a Recurring, or One Time Fee when you are in any tab in a Family Account. Go to Family Accounts (left menu) > View # Active Family Account and select the family. Then go to the Actions menu > Add Fee.

New Tuition Fee
- Select New Tuition Fee and click Next.
- Select the child using the Search Families or Children field, then select a class from the Current and future enrollments list and click Next.
- Adjust the Tuition Fee Amount and Description if needed, then click Next.
- Select the Payer, the Billing start date, and use the toggle to set an optional Billing end date before clicking Next.
Note: If no Billing end date is specified, the tuition billing will end the date a class ends or the child drops a class. - Use the toggle to select optional Dates of Service to bill for and click Next.
Note: Refer to Select Dates of Service for more information. - Use the toggle to optionally Add a One-Time adjustment fee and click Next.
- Description - An optional brief summary about why the tuition amount was adjusted.
- Amount - Enter the additional amount of how much to adjust the tuition for. For example, if a class meeting five times per week has a tuition of $100 and the child will attend one extra day outside of the weekly billing period, an additional $20 adjustment may be appropriate.
- Use the toggle to add an optional Discount and click Next. Then click Complete Fee.
- Choose the Discount Type and Category for the discount from the drop-down menus.
- Select if the discount is a flat Amount or a Percentage of the overall tuition, then set the discount amount.
- Add an optional Description for the discount.

Recurring Fee
- Select Recurring Fee and click Next.
- Select the child using the Search Families or Children field and click Next.
- Select a Category from the drop-down menu or use the +New Fee Category button, add the Recurring Fee amount and Description if needed, and click Next.
- Select the Payer, Billing Profile, Billing start date, and use the toggle to set an optional Billing end date before clicking Next.
Note: If no Billing end date is specified, the fee is billed until the transaction is manually stopped in the Scheduled section of a family's transactions. For more information, see how to Work with a Family's Transactions.
- Use the toggle to add an optional Discount and click Next.
- Choose the Discount Type and Category for the discount from the drop-down menus.
- Select if the discount is a flat Amount or a Percentage of the overall tuition, then set the discount amount.
- Add an optional Description for the discount.
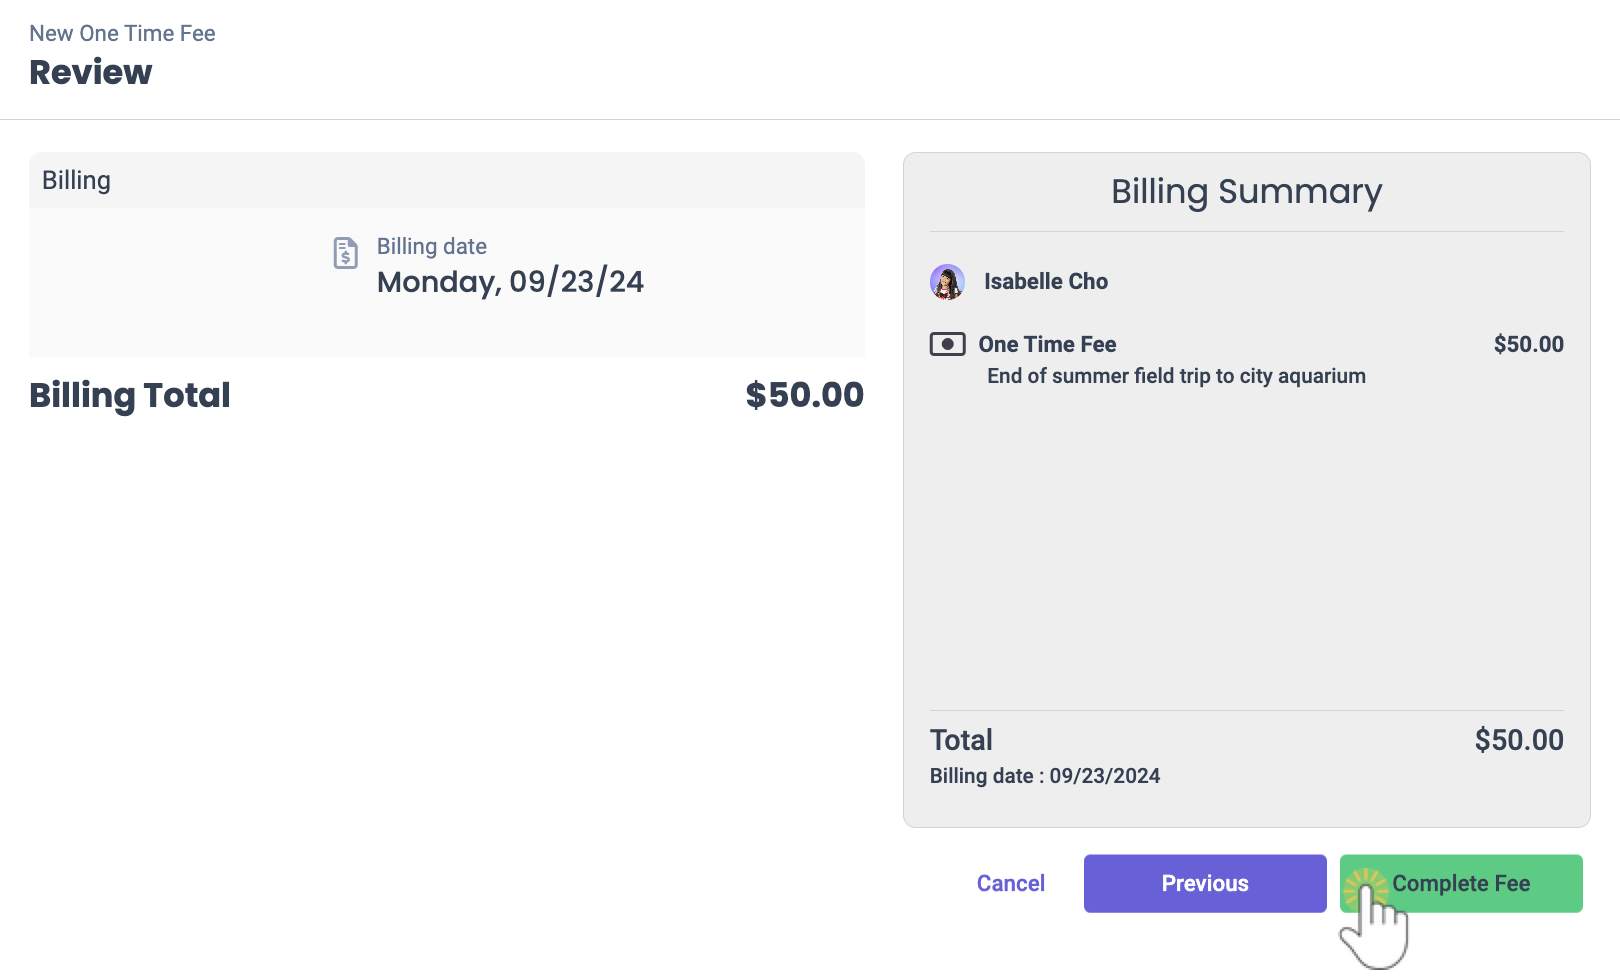
- Review the Billing Summary and click Complete Fee.

One Time Fee
- Select One Time Fee and click Next.
- Select the child using the Search Families or Children field and click Next.
- Select a Category from the drop-down menu or use the +New Fee Category button, add the One Time Fee amount and Description if needed, and click Next.
- Select the Payer, Billing Profile, and Billing date or use the toggle to optionally Invoice Now before clicking Next.
- Use the toggle to add an optional Discount and click Next.
- Choose the Discount Type and Category for the discount from the drop-down menus.
- Select if the discount is a flat Amount or a Percentage of the overall tuition, then set the discount amount.
- Add an optional Description for the discount.
- Review the Billing Summary and click Complete Fee.

Add a Fee in the Finances Section
You can add a New Tuition Fee, Recurring Fee, or a One Time Fee by going to Finances (left menu) > Billing card > Add Fees.

New Tuition Fee
- Select New Tuition Fee and click Next.
- Select the child using the Search Families or Children field, then select a class from the Current and future enrollments list and click Next.
- Adjust the Tuition Fee Amount and Description if needed, then click Next.
- Select the Payer, the Billing start date, and use the toggle to set an optional Billing end date before clicking Next.
Note: If no Billing end date is specified, the tuition billing will end the date a class ends or the child drops a class. - Use the toggle to select optional Dates of Service to bill for and click Next.
Note: Refer to Select Dates of Service for more information. - Use the toggle to optionally Add a One-Time adjustment fee and click Next.
- Description - An optional brief summary about why the tuition amount was adjusted.
- Amount - Enter the additional amount of how much to adjust the tuition for. For example, if a class meeting five times per week has a tuition of $100 and the child will attend one extra day outside of the weekly billing period, an additional $20 adjustment may be appropriate.
- Use the toggle to add an optional Discount and click Next. Then click Complete Fee.
- Choose the Discount Type and Category for the discount from the drop-down menus.
- Select if the discount is a flat Amount or a Percentage of the overall tuition, then set the discount amount.
- Add an optional Description for the discount.

Recurring Fee
- Select Recurring Fee and click Next.
- Select the child using the Search Families or Children field and click Next.
- Select a Category from the drop-down menu or use the +New Fee Category button, add the Recurring Fee amount and Description if needed, and click Next.
- Select the Payer, Billing Profile, Billing start date, and use the toggle to set an optional Billing end date before clicking Next.
Note: If no Billing end date is specified, the fee is billed until the transaction is manually stopped in the Scheduled section of a family's transactions. For more information, see how to Work with a Family's Transactions.
- Use the toggle to add an optional Discount and click Next.
- Choose the Discount Type and Category for the discount from the drop-down menus.
- Select if the discount is a flat Amount or a Percentage of the overall tuition, then set the discount amount.
- Add an optional Description for the discount.
- Review the Billing Summary and click Complete Fee.

One Time Fee
- Select One Time Fee and click Next.
- Select the child using the Search Families or Children field and click Next.
- Select a Category from the drop-down menu or use the +New Fee Category button, add the One Time Fee amount and Description if needed, and click Next.
- Select the Payer, Billing Profile, and Billing date or use the toggle to optionally Invoice Now before clicking Next.
- Use the toggle to add an optional Discount and click Next.
- Choose the Discount Type and Category for the discount from the drop-down menus.
- Select if the discount is a flat Amount or a Percentage of the overall tuition, then set the discount amount.
- Add an optional Description for the discount.
- Review the Billing Summary and click Complete Fee.

Add a New Tuition Fee During Enrollment
A tuition fee can be added at the time children are enrolled in a class.
- Learn how to Add a New Tuition Fee During Enrollment.
Edit or Delete a Fee
All fees can be edited or deleted on a family's Transactions tab. Locate the fee under the Scheduled or Pending sections and click the Options icon![]() on the right side of the fee you want to work with.
on the right side of the fee you want to work with.

- Click Edit to open an Edit Fee window and update the Amount, Description, or End Date for the fee, then click Save.
- Edits made to a fee in the Scheduled section will change the fee for all future invoices. Pending fees are not affected.
- Edits made to a fee in the Pending section will only change the fee for the current invoice. Scheduled fees are not affected.
- Click Delete to remove the fee, then click Delete in the Delete Scheduled Fee window to confirm.
-
Deleting a fee in the Scheduled section removes all future occurrences of the fee. The current fee in Pending is not deleted.
-
Deleting a fee in the Pending section removes only the current instance of the fee. Future Scheduled fees are not deleted.
-


