Schedules are designated blocks of time during the day that match the classes you offer. For example, if you offer before-school care, you must create a Schedule for those classes. If you offer after-school care, those classes require a different time Schedule. A Schedule is assigned to a class once the class is created in your system.
Owners automatically have permissions to set up Schedules. However, an Administrator is limited to creating Schedules for only the site(s) they were assigned when they were added as a Team Member.
Create a Schedule
Ensure the correct site is selected at the top of the page, then follow these steps to create a Schedule:
- Go to Settings (left menu) > Site Settings card > Manage All # Schedules to open the Schedules tab.
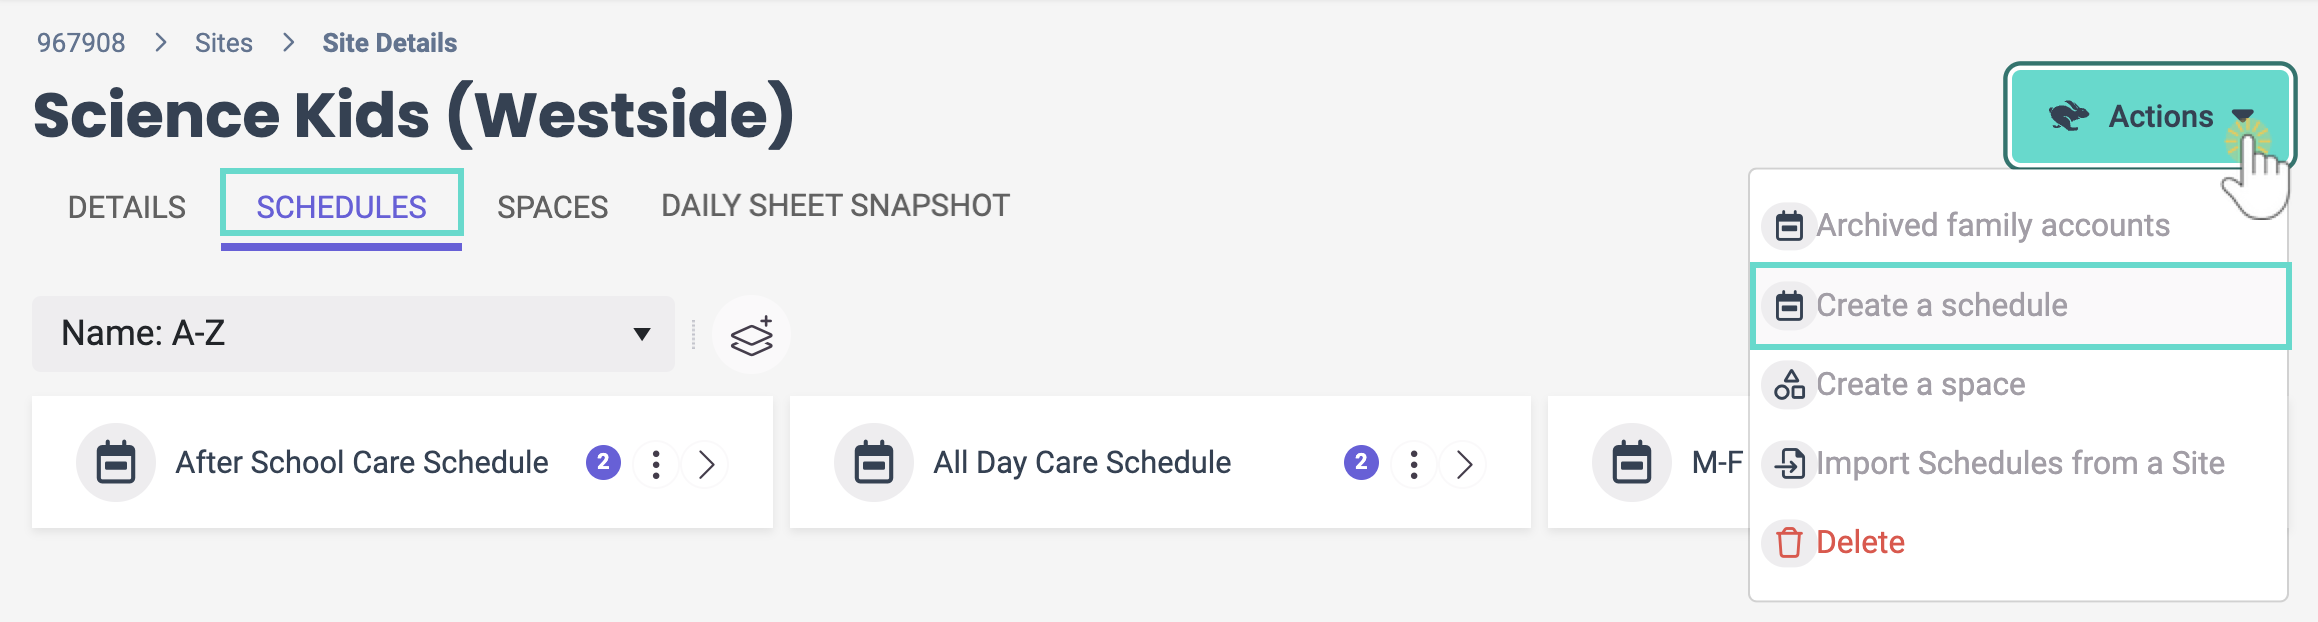
- Click the Actions menu
 > Create a schedule.
- Add a Schedule Name and click Next.
- Enter the Schedule Days/Times.
- To split times throughout the day (For example, 9 AM-12PM and 3PM-6PM) click the green Add + button
 to the right of the time slot after clicking on the day.
 - To quickly duplicate a day's time across multiple days, click the first day and enter the times, then click the other days that use the same times.
- To split times throughout the day (For example, 9 AM-12PM and 3PM-6PM) click the green Add + button
- Click Save. The schedule has been created and can be assigned to a class.
 > Create a schedule.

 to the right of the time slot after clicking on the day.
Import a Schedule From Another Site
If your organization has multiple sites, an Owner or Administrator can import Schedules from one site to another. This is helpful and will save time if you want to use the same Schedules at different sites. Ensure you have the site selected you want to import the Schedule to, then do the following:
- Go to Settings (left menu) and click any of the links found on the Site Settings card.
- Click the Actions menu> Import Schedules from a Site to open the Import Schedules window.
- Select the site you want to import Schedules from by using the drop-down menu.
- Use the top checkbox to select all the Schedules on the list or select only an individual Schedule from the list.
- Click Import # Schedules.


Add a Schedule to a Class
To enroll children in classes, at least one Schedule must be assigned to it. Assign a Schedule to a class by doing the following:
- Go to Programs & Classes (left menu) > Programs & Schedules card > View All Classes.
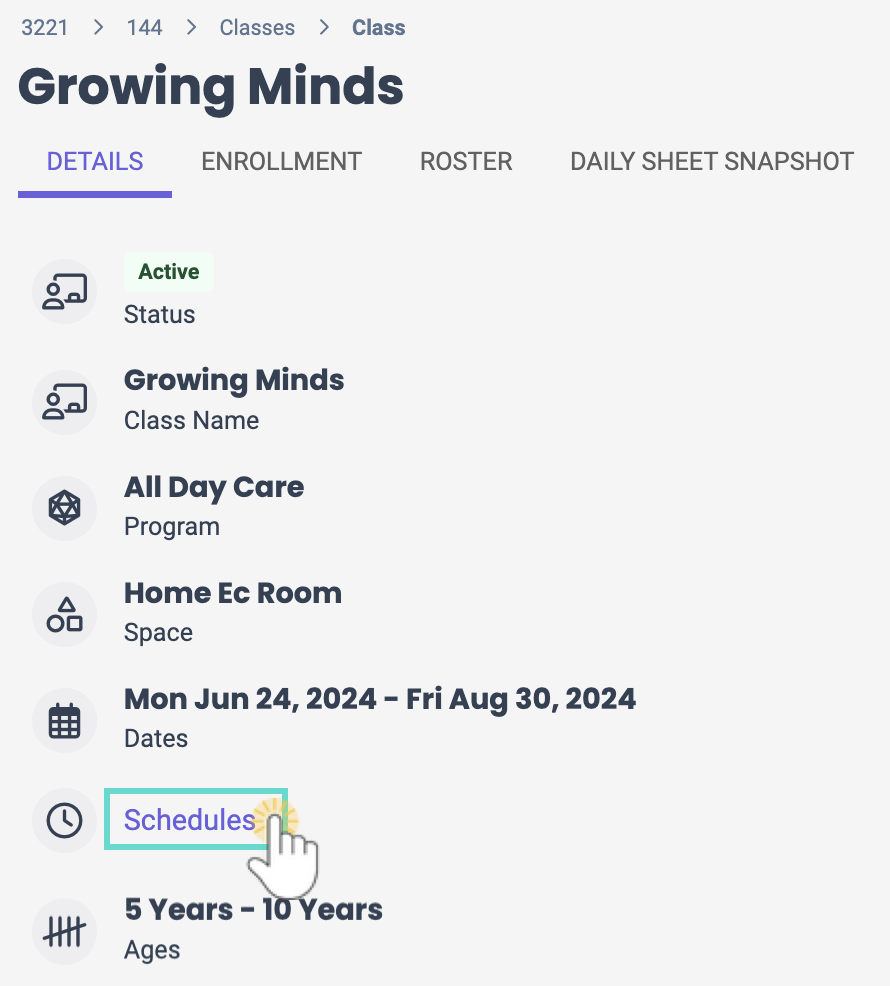
- Select the class that needs a Schedule, then click the Schedules link.
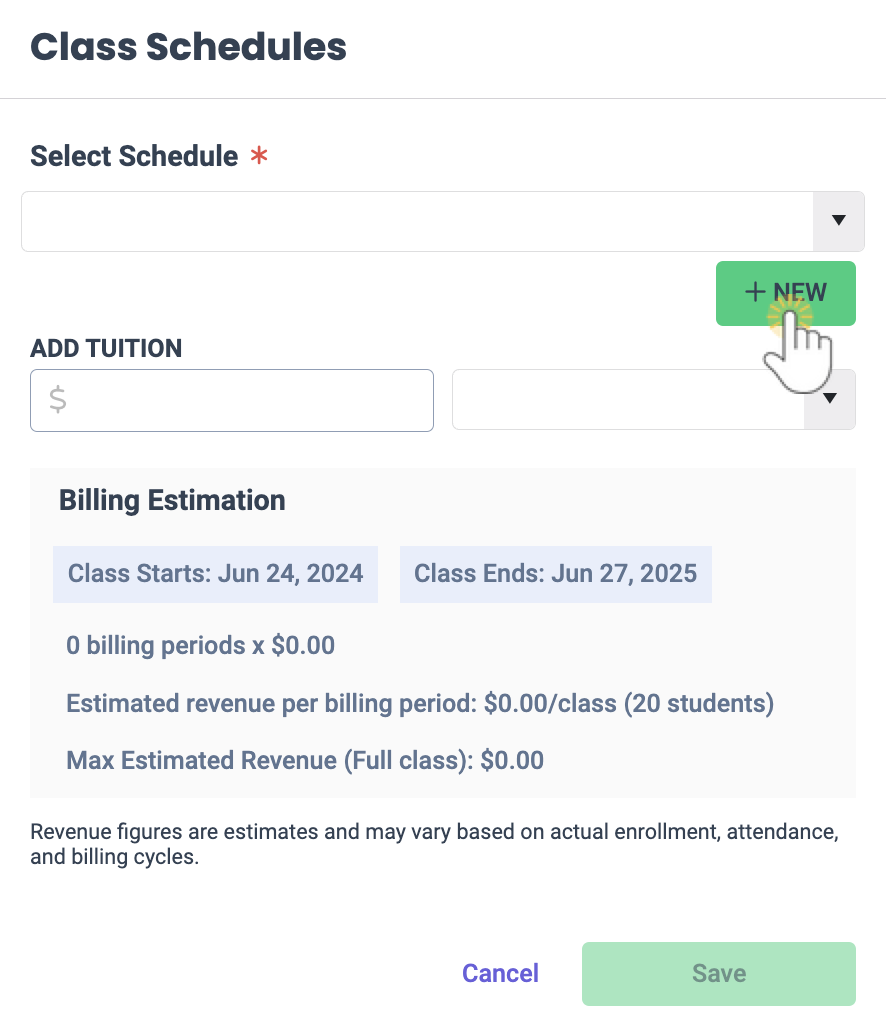
- Use the drop-down menu to select an existing Schedule or click the + Add button to create a new Schedule for the class.
- Add Tuition and the frequency of billing for this class's Schedule, then click Save.
Note: Billing Estimation calculates the estimated revenue based on the billing periods occurring during the scheduled period and the maximum group size.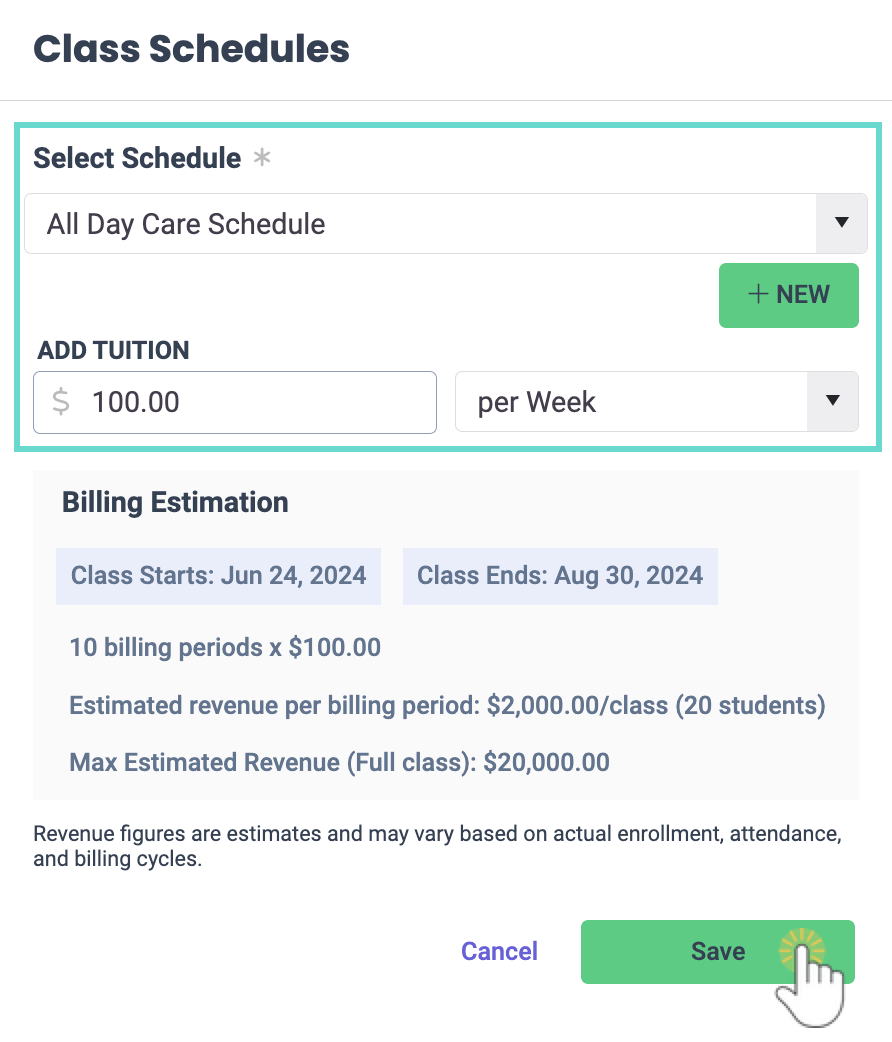


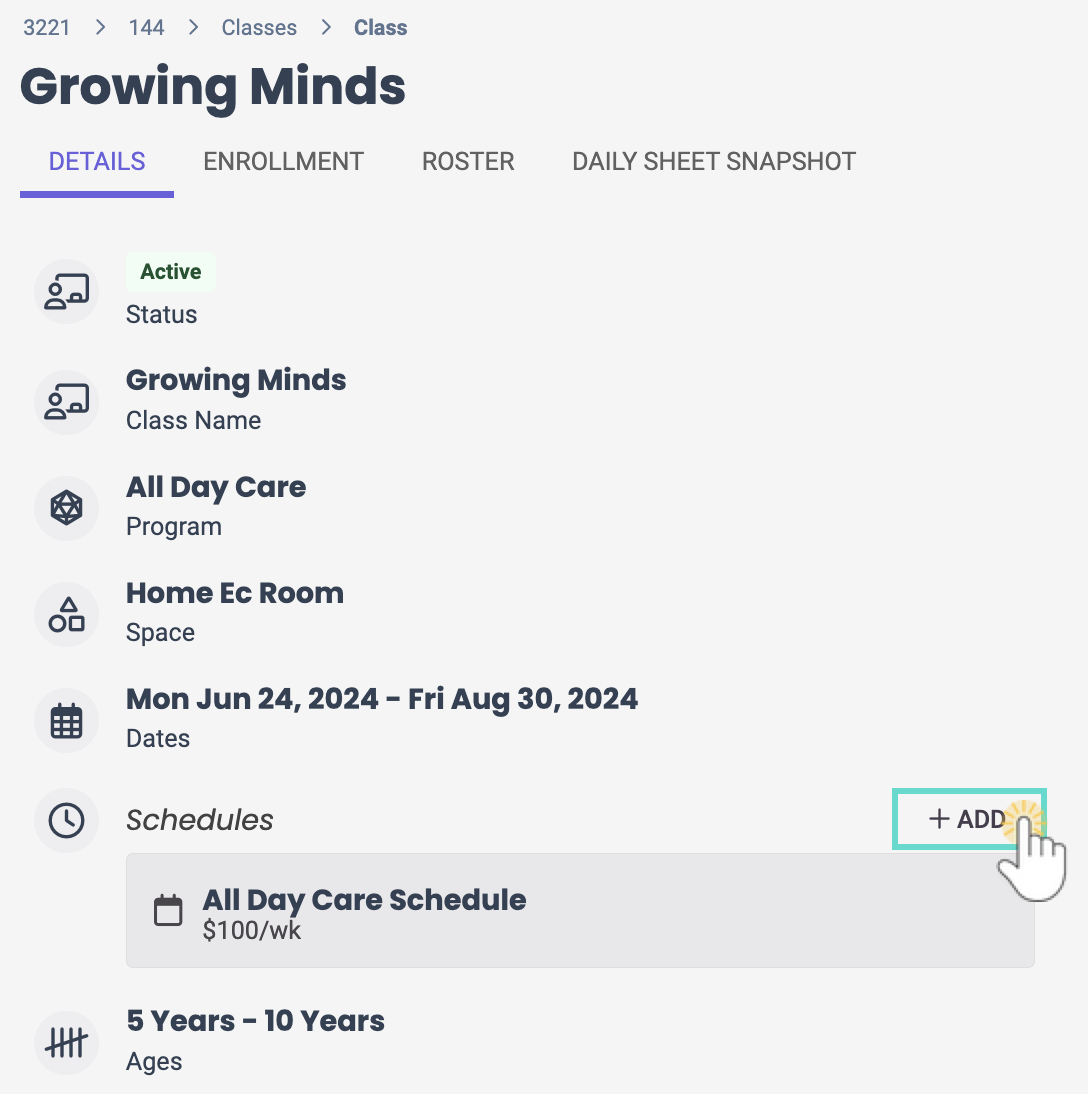
Classes can have multiple Schedules assigned to them. To add a second Schedule to a class, click the + Add link in the Schedules section.
View and Edit Schedule Details
To view a Schedule's details, go to Settings (left menu) > Site Settings card > Manage All # Schedules.
- Click the Expand icon
 to expand all Schedules on the page.
 - Use the arrow icon
 on a single Schedule to expand it.
 - The color circles indicate how many classes are using the Schedule.
- Click the Options icon
 > Schedule Details to go to a Schedule's Details tab. While on the Details tab, you can do the following to edit a Schedule's details:
- Click on the Schedule name to rename the Schedule.
- Click on the Classes tab to see the classes the Schedule is assigned to.
- Click on Days & Times to modify the selections. The Schedule can't be modified if a class is assigned to it.
- Use the Actions menu> Delete to delete a Schedule if no classes have been assigned to it.
 to expand all Schedules on the page.
Modify Existing Schedule Times
If you're an Owner or Administrator, you may need to change a Schedule while a class is still in session. Follow this process to smoothly transfer children from the old Schedule to the new one:
Step 1 - Create a New Schedule
- Go to Programs & Classes (left menu) > Programs & Schedules card > View All Classes.
- Select the class with the already assigned Schedule. Click the + Add button to add another Schedule.
- Click the + New button in the Class Schedules window.
- Add a Name and click Next.
- Enter the Schedule Days/Times, then click Save.
- To split times throughout the day (For example, 9 AM-12PM and 3PM-6PM) click the green Add + buttonto the right of the time slot after clicking on the day.
- To quickly duplicate a day's time across multiple days, click the first day and enter the times, then click the other days that use the same times.

- To split times throughout the day (For example, 9 AM-12PM and 3PM-6PM) click the green Add + button
- Add the Tuition in the Class Schedules window, and click Save. The new schedule will appear in the Schedules section of the class Details tab.


Use caution when naming your Schedules. Try to pick a name that will clearly be associated with the new class schedule and not the old schedule that you will delete in the last step of this process.
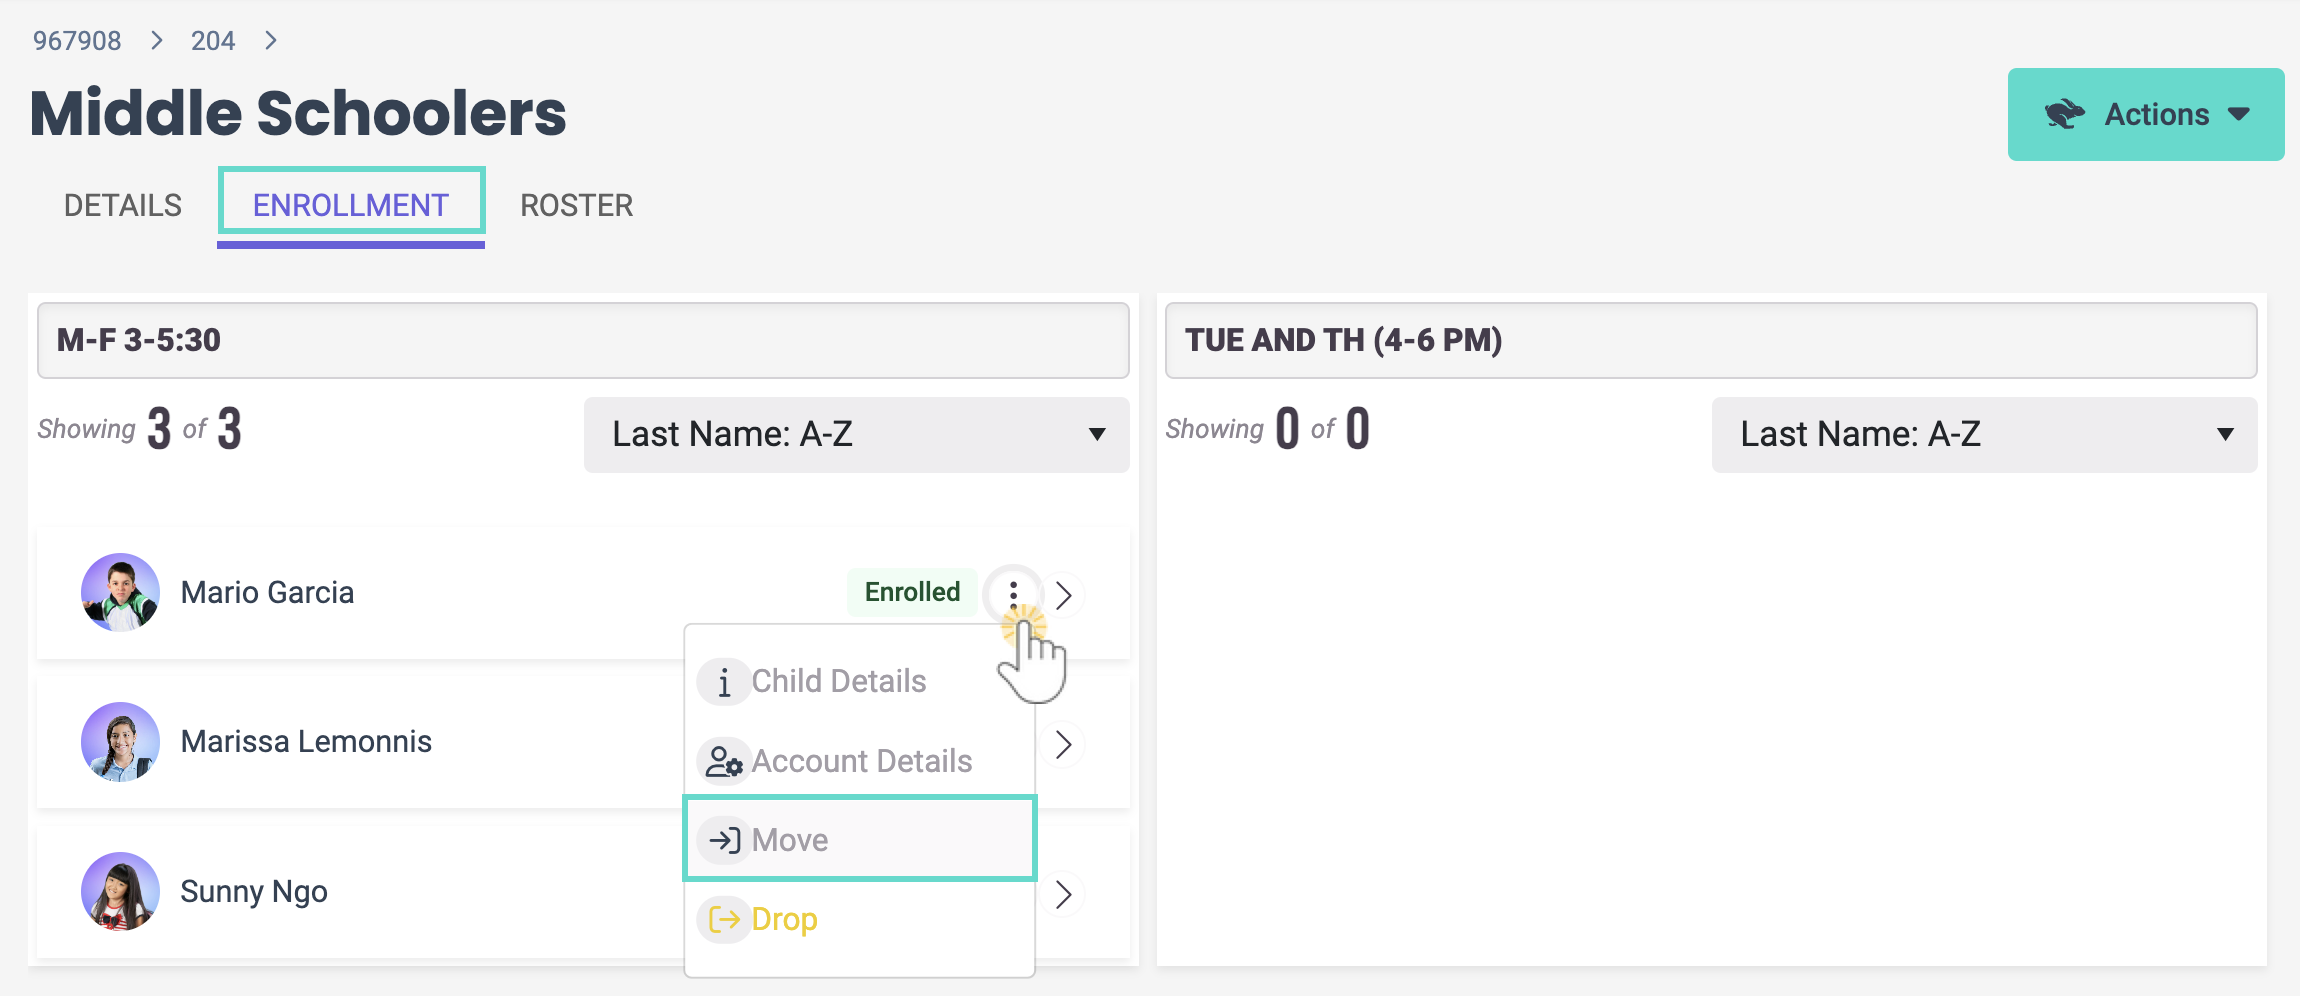
Step 2 - Move Children to the New Schedule
- Click the Enrollment tab on the top of the current page.
- Click the Options icon
 > Move.
- Enter the information in the Move Child window.
- Which Class are we moving to? - Select the same class.
- Are they attending class today? - Set the toggle to No if the child will not be attending the class today, otherwise leave the setting as Yes and the move will happen after the class has been completed for the day.
- Which schedule are we moving to? - Select the new Schedule you just created.
- Start Date - Enter the date the child will start the new Schedule.
- Drop Reason - We recommend you use Other.
- Click Move. You will see a Move Completed window confirming all the details.
- Click Ok. Repeat this process until all the children in the class are moved to the new Schedule. You can now move to step 3 and delete the original Schedule.

A child can also be moved to a class with the new Schedule from the Openings Over Time page. Go to Enrollment (left menu) > Find and Create Openings link and select the child from the class list. Click the Options icon![]() > Move to start the move process.
> Move to start the move process.
Step 3 - Delete the Original Schedule
It's best to delete the old Schedule if it is not in use by any classes. However, you can choose to keep it if you intend to use it at a later date for a different class or children. Follow these steps to delete a Schedule:
- Go to the Details tab on the top of the current page.
- Click the Schedule you want to delete in the Schedules section.
- Click Delete in the Class Schedules window.
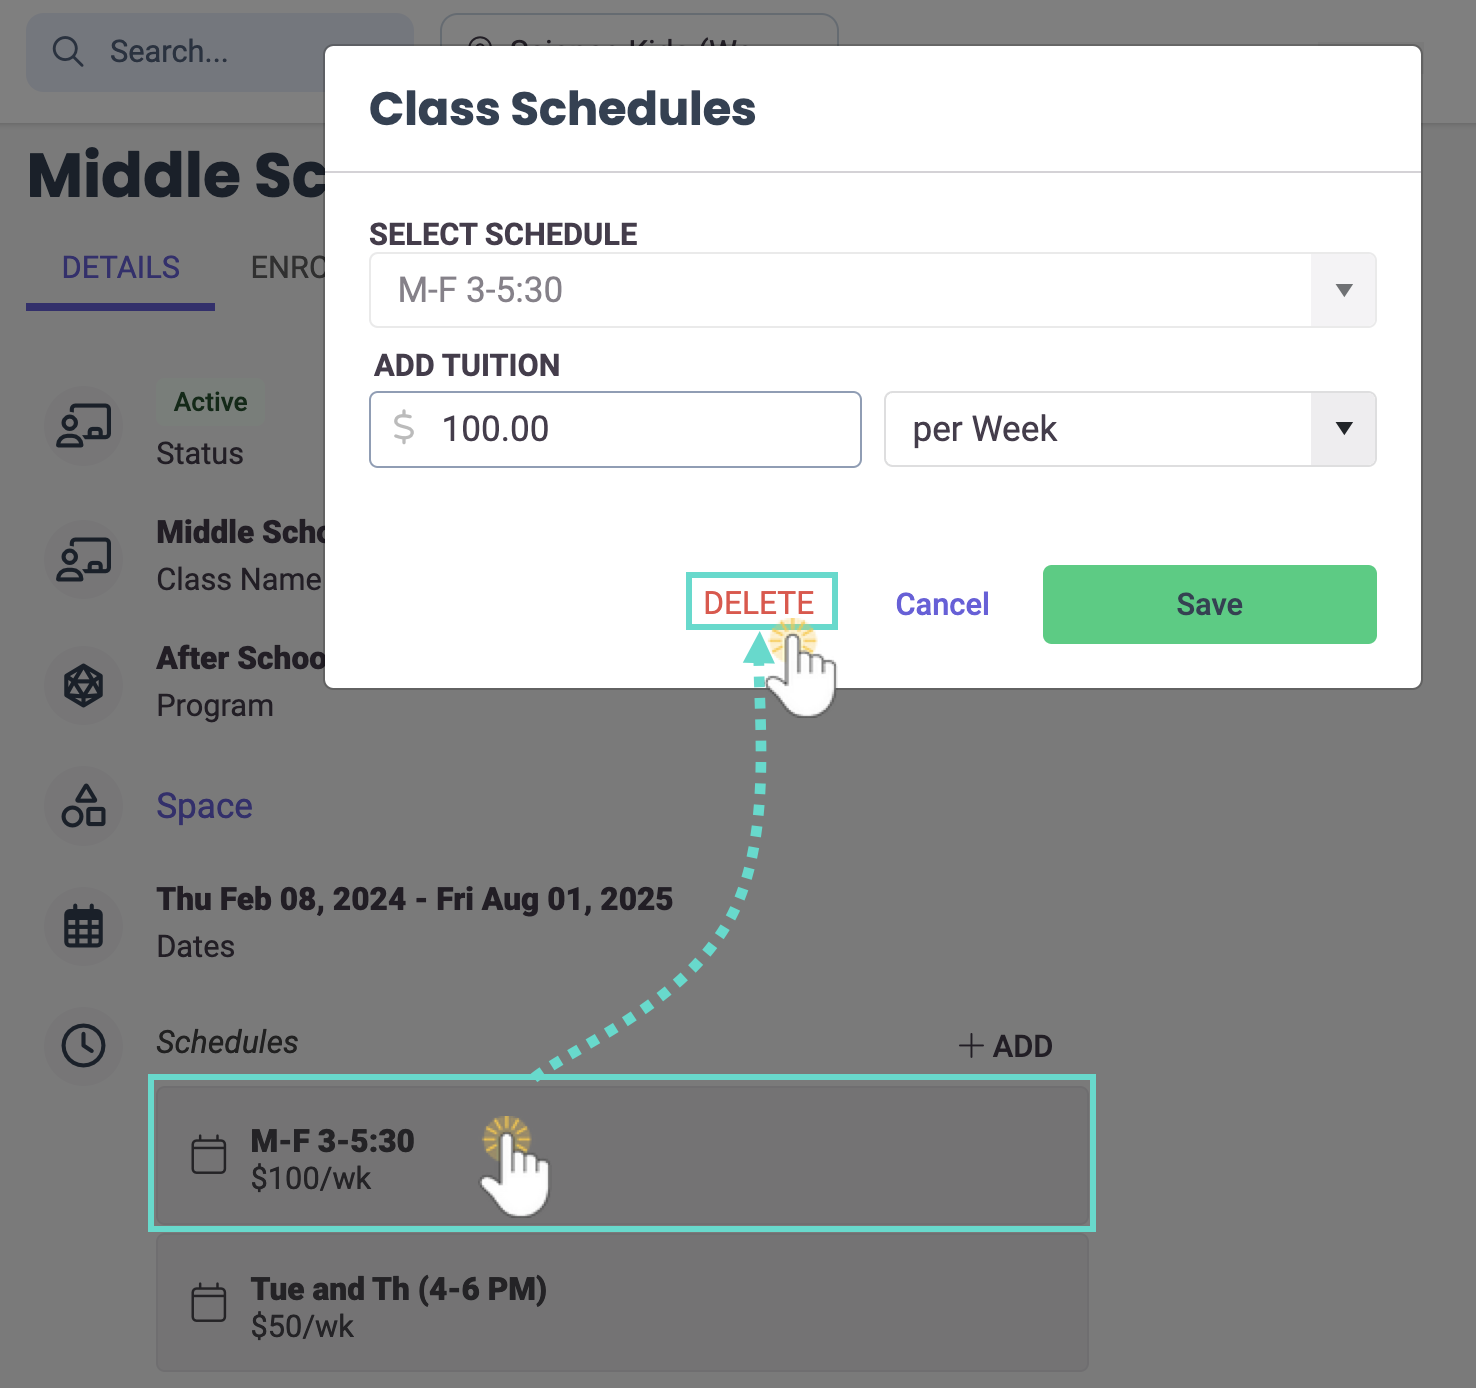
- Confirm you want to delete the schedule and click Delete. The schedule will immediately be removed from the Schedules section.

Delete a Schedule
Ensure the correct site is selected at the top of the page, then follow these steps to delete a Schedule once no classes are assigned to that Schedule:
- Go to Settings (left menu) > Site Settings card > Manage All # Schedules.
- Click the Schedule card for the Schedule you want to delete.
- If a Schedule doesn't have any classes assigned to it, you'll notice there's no purple circle on its card, indicating it can be deleted.
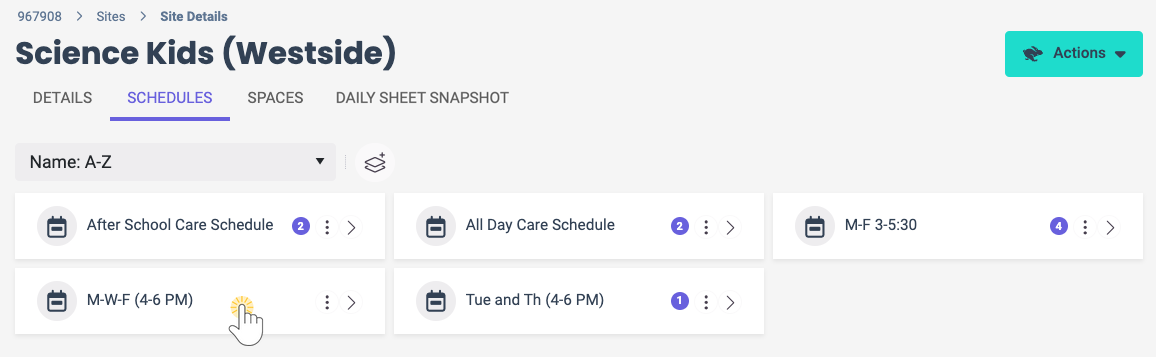
- If a Schedule doesn't have any classes assigned to it, you'll notice there's no purple circle on its card, indicating it can be deleted.
- Go to the Actions menu> Delete.
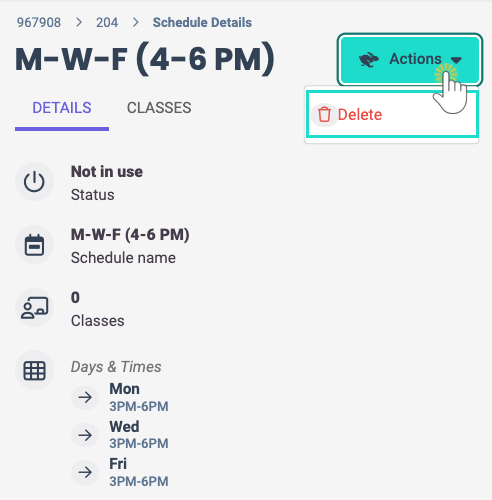
- Click Delete to confirm deleting the Schedule.


Need to delete Schedules assigned to classes or with children enrolled in them? Follow steps 2 and 3 found in the Modify Existing Schedule Times section.
