Mass Billing provides Owners and Administrators with a way to easily apply payments or one-time fees to multiple families by going to Finances (left menu) > Billing card > Mass Billing. While using Mass Billing:
- Filter by weekly, bi-weekly, or monthly billing profiles.
- Apply payments to multiple families.
- Charge one-time or recurring fees in bulk.
- See when a payment is declined and the details about the declined payment.
Report Features
The Mass Billing report reports in real-time. Review the information in the included columns:
- Account Name - Click the Account Name to go to the Family Details page.
- Payer Name - Click the Payer's name to go to their Details tab.
- Online Payment Status - A Ready badge indicates the Payer has a payment method saved on file, while an Action Required badge indicates no payment method is saved to their account.
- Billing Profile Name - Displays the name for a Payer's Billing Profile.
- Last Payment - Shows the amount of the last payment made by the Payer and a badge indicating the payment status such as Completed, Processing..., or View Declined Payment.
- Last Payment Date - Indicates the date and time of the last payment made on the Payer's account.
- Balance - Shows the current balance on the Payer's account.
Use the following features found on the Mass Billing report:
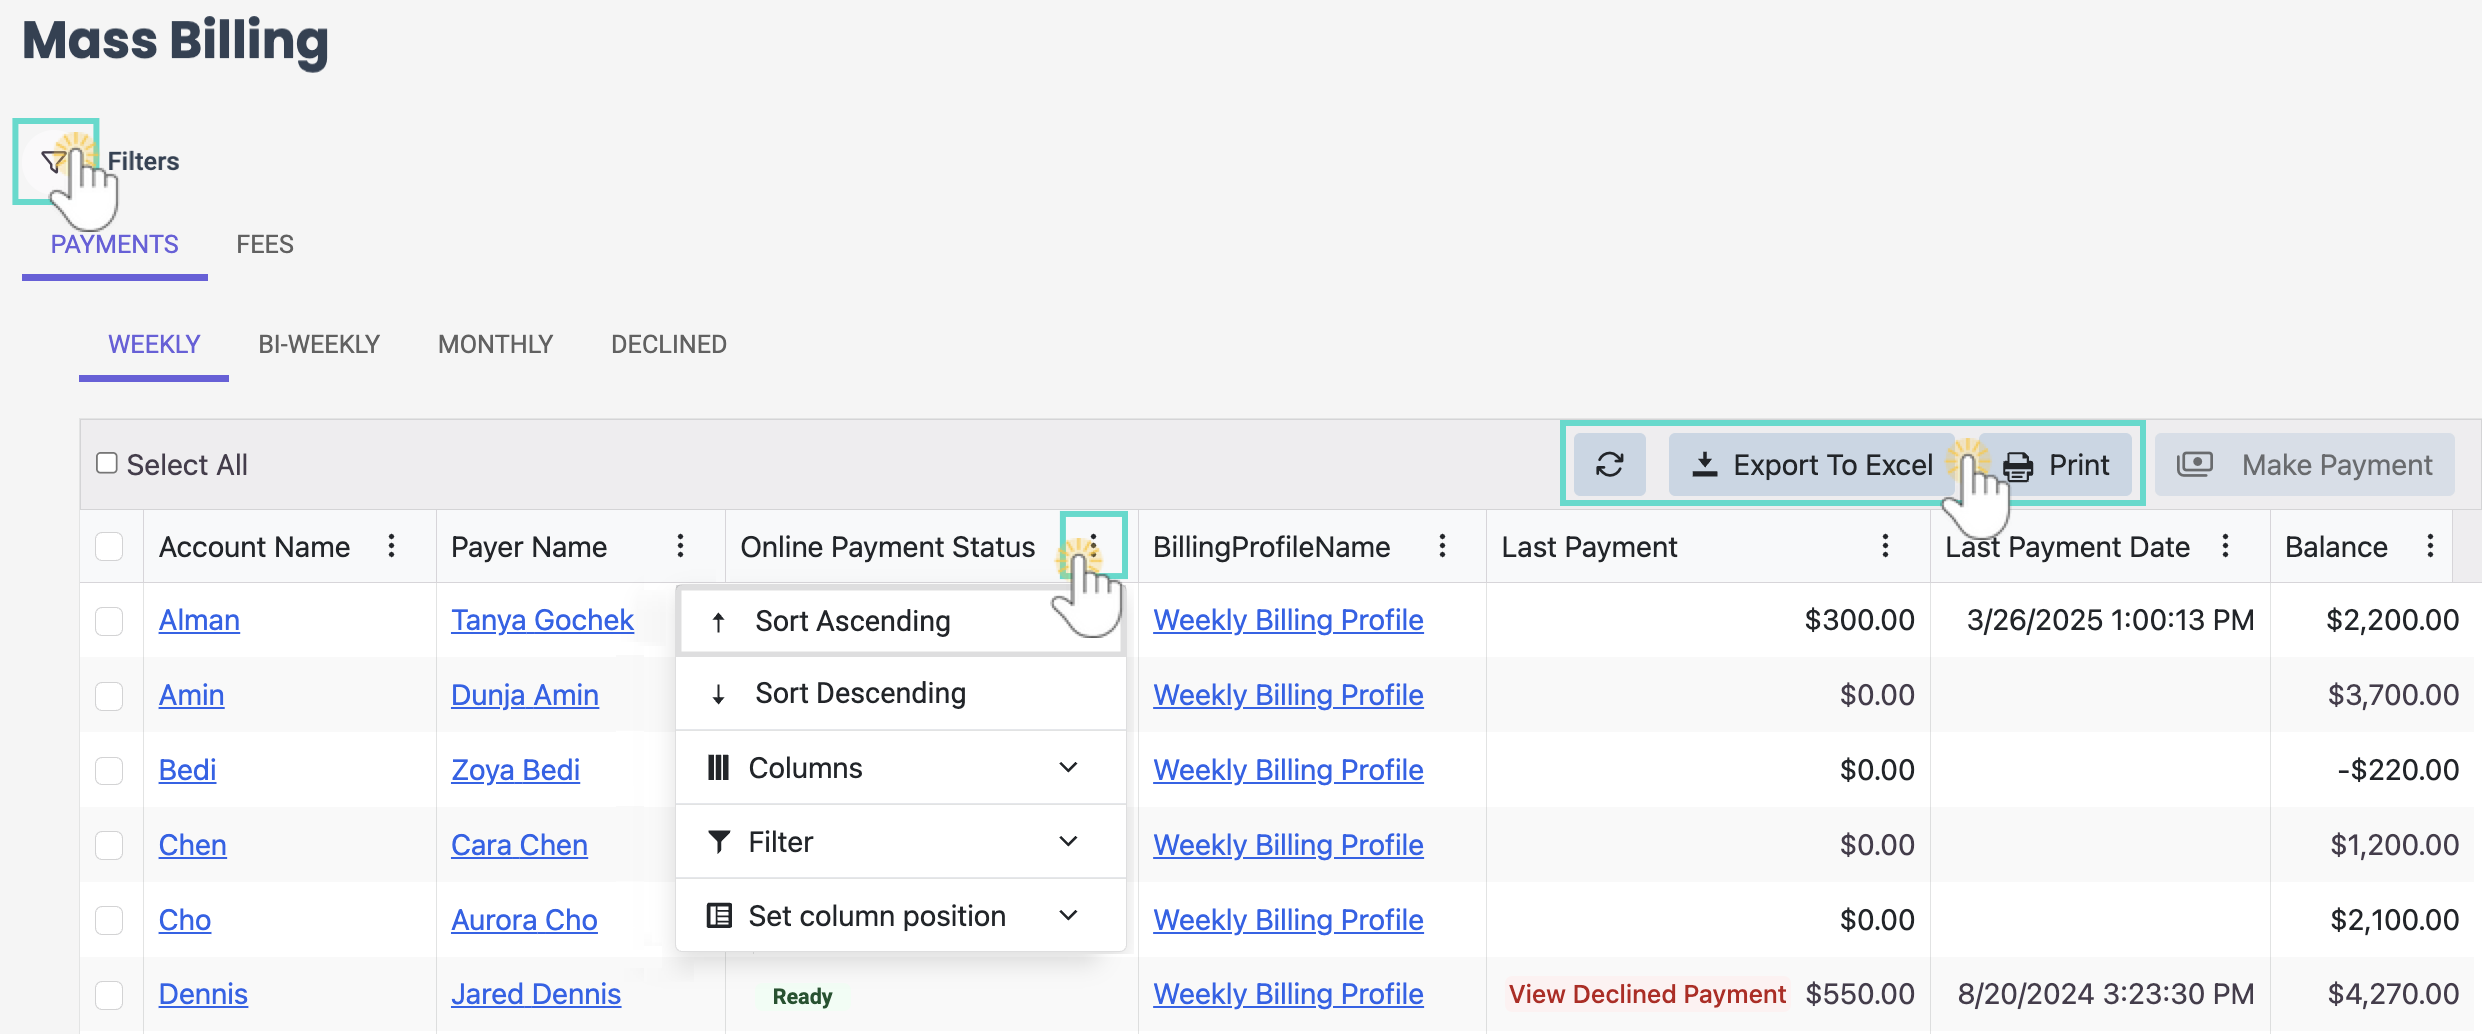
- Click the Filter icon
 to open a sliding filter panel on the right. Use this panel to filter the data to show only balances greater than $0 or accounts with a payment method on file.
 - Use the Column Menu icon
 to sort, filter, add, remove columns, or set the column position.
 - Click the Refresh icon
 after making a payment to update the data shown.
 - Click Export To Excel or Print the grid as needed.
 to open a sliding filter panel on the right. Use this panel to filter the data to show only balances greater than $0 or accounts with a payment method on file.
Applying Payments to Families
Make Payments
While using Mass Billing, only Payers with a payment method on file may have a payment applied to their account. To apply payments to one or multiple families who have a saved payment method on file, follow these steps:
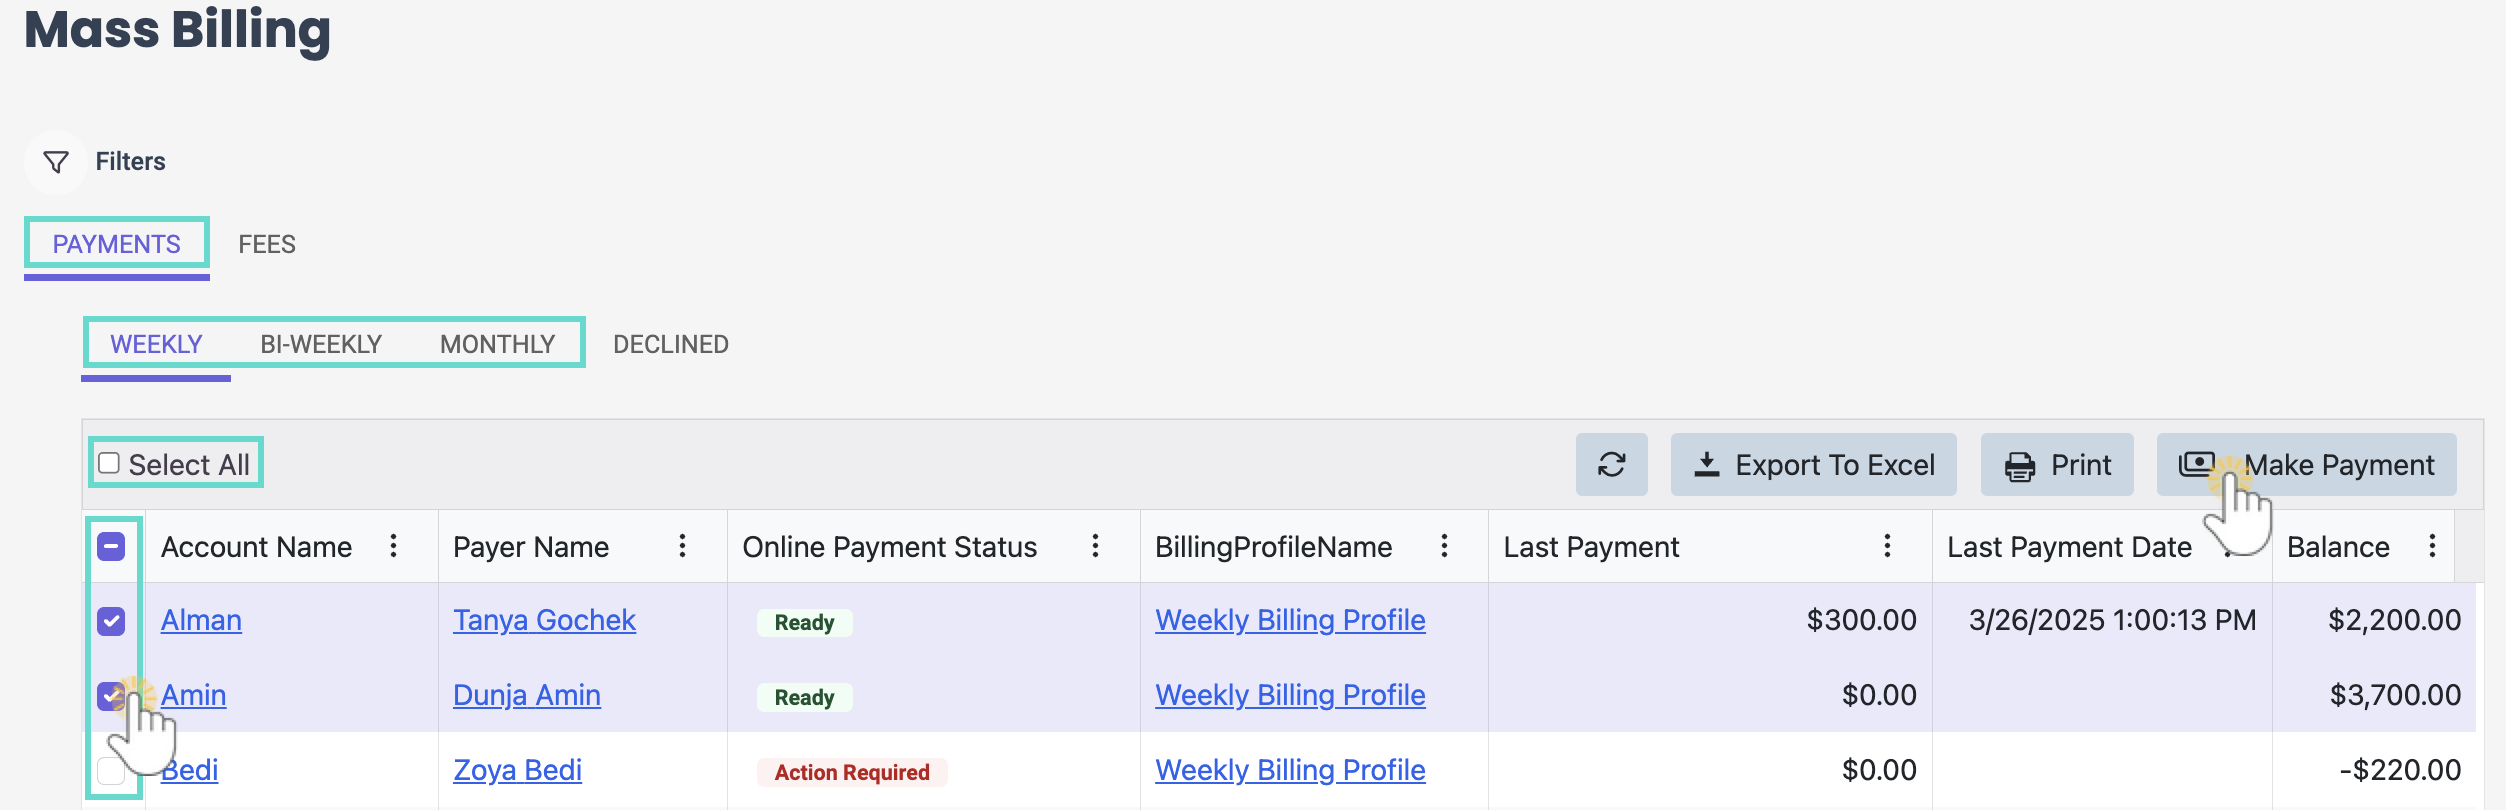
- Go to the Payments tab, then click either the Weekly, Bi-Weekly, or Monthly tab, based on the Payer's billing profile.
- Select the families using the checkboxes on the left, or click Select All to choose all accounts.
- Click Make Payment.
- Select if the payment is the Full Balance or a Custom Amount for the account(s).
- If selecting a Custom Amount, enter in the amount.
- Add a Description (optional) and click Next.
- Confirm the payment information is correct and click Pay with Jackrabbit Pay.
- See payment processing details in the Payments in Progress window. When payments are complete, the window will change to Payments Completed with the number of accounts that payments were applied to and the total amount.
- Click Close to complete this process. If any payment methods were declined, click Review to see more details.

An Online Payment Status of Ready implies a payment can be made, while Action Required means no payment method is on file.
See Declined Payments
To see which payments were declined after processing, look for the View Declined Payment badge in the Last Payment column while on the Payments tab for Weekly, Bi-Weekly, or Monthly billing profiles. Click the badge for more information.
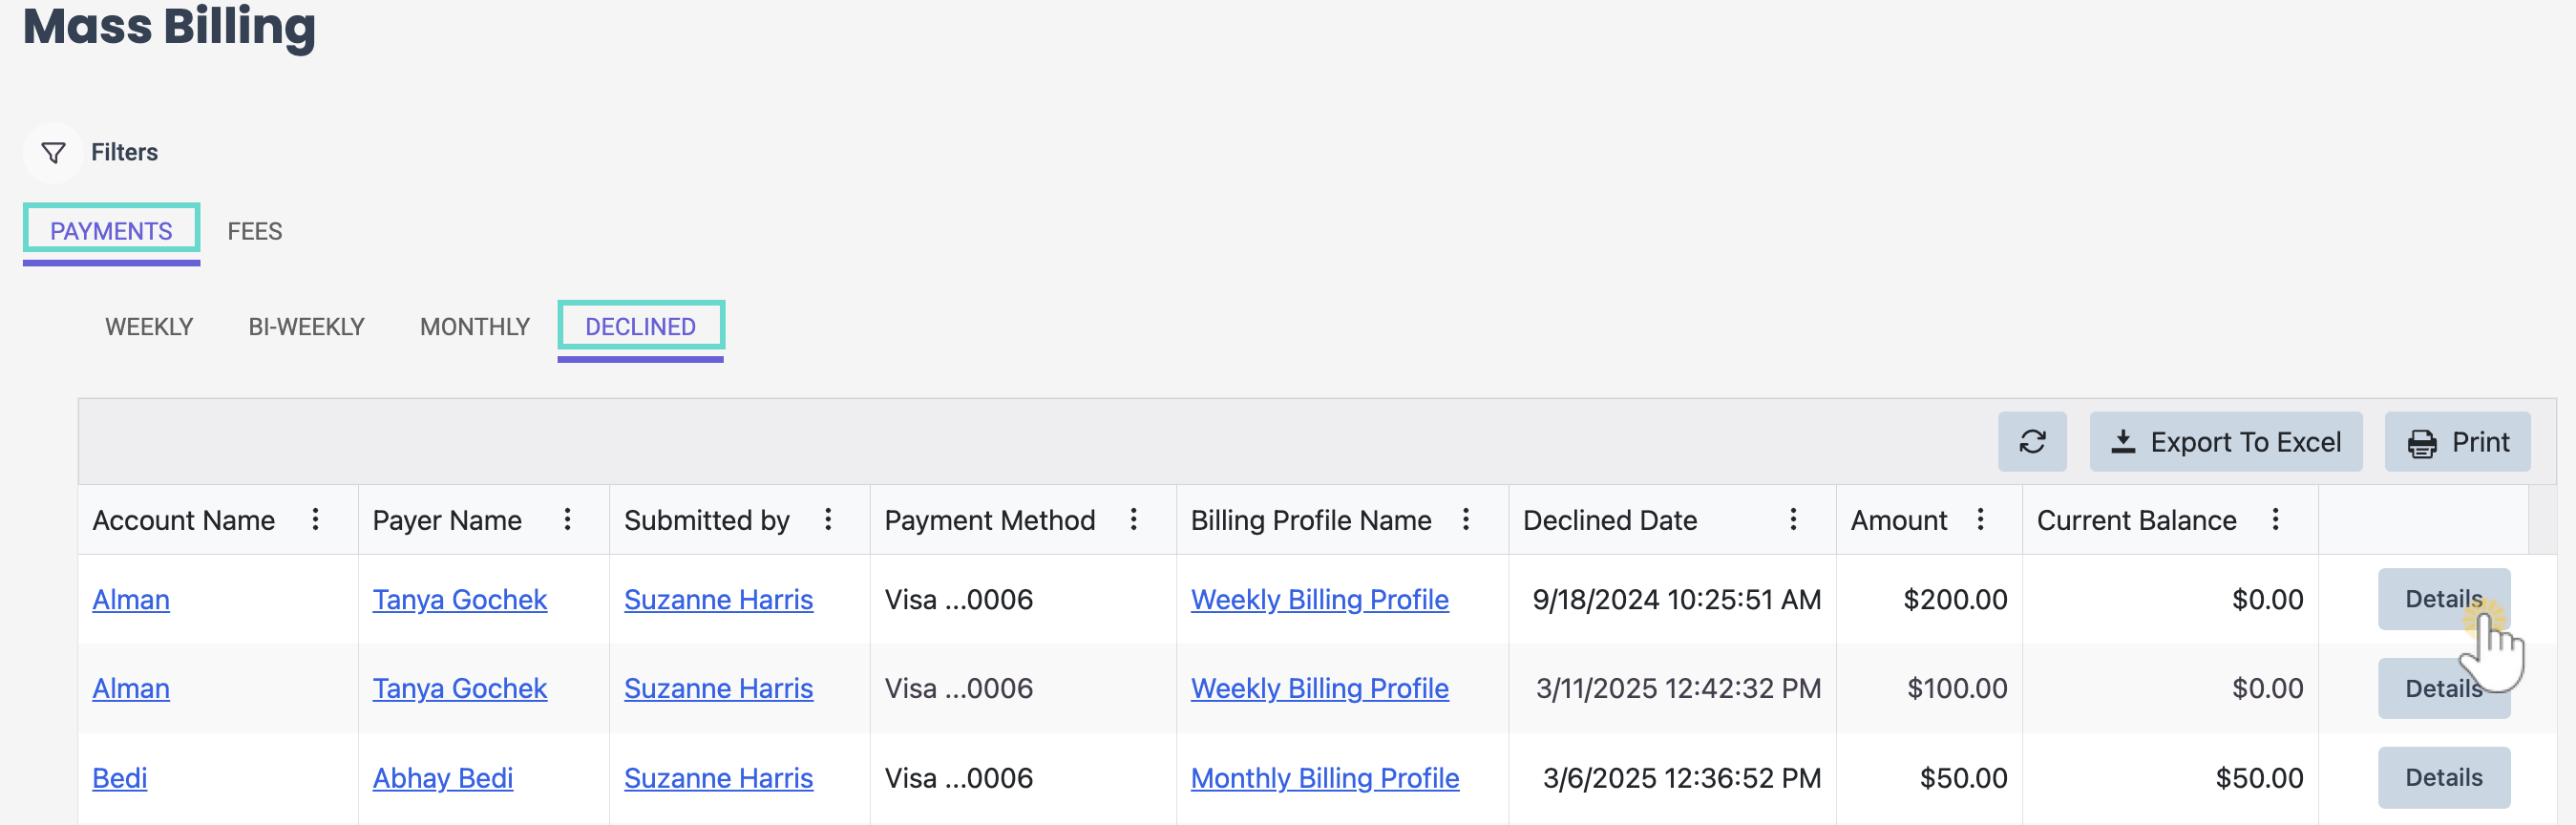
Do the following to see a history of all declined payments:
- Go to the Payments tab, then click the Declined tab.
- Review the details in the included columns.
- Click the Details button to see more information about individual declines, such as the reason for the decline.

Declined payment information can also be viewed when viewing a Family's Transactions in the Ledger Transactions section.
Applying Fees to Families
Add One-Time Fees
Add a one-time fee to one or more families by doing the following:
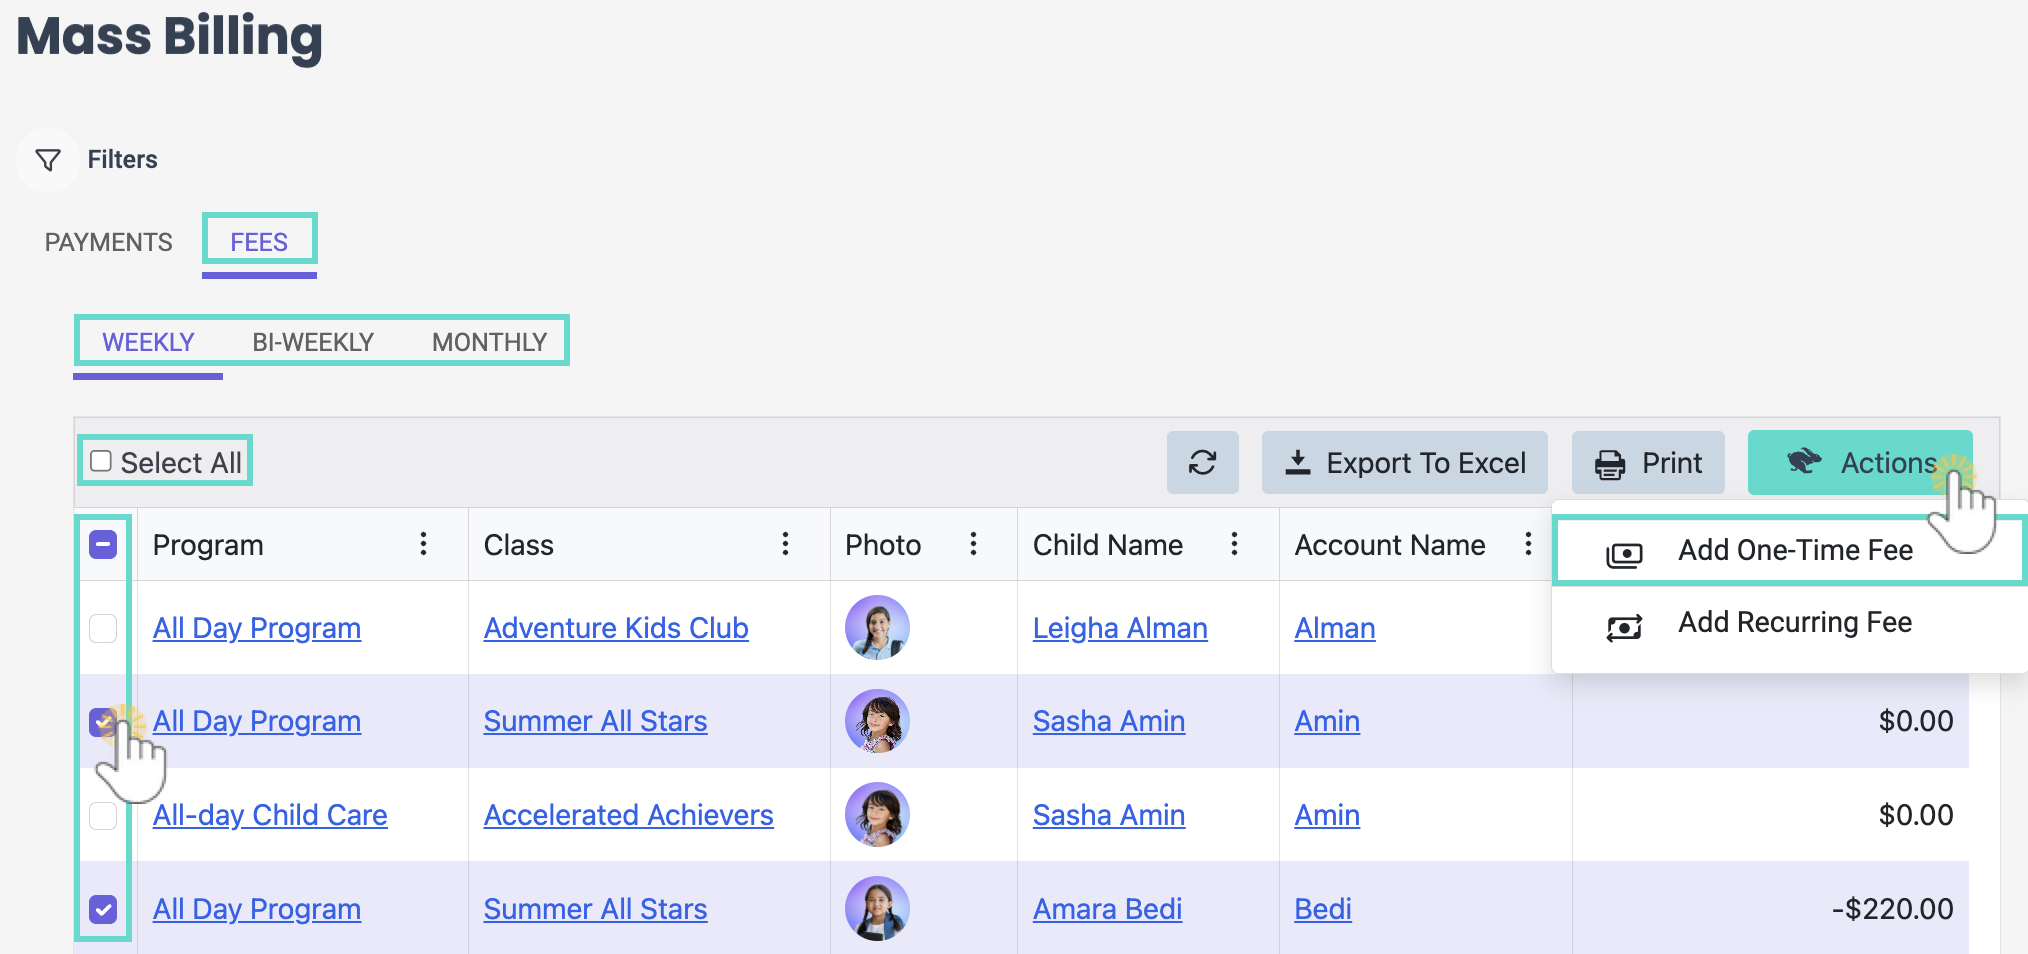
- Go to the Fees tab, then select the families using the checkboxes on the left, or click Select All to choose all accounts.
- Click the Actions menu
 > Add One-Time Fee.
- Select a Category from the drop-down menu or use the +New Fee Category button. Then, enter the One Time Fee Amount, add an optional Description and click Next.
- Use the Invoice Now toggle to charge the one-time fee immediately, or select a Billing date to apply the fee on a specific date in the future.
- Use the toggle to apply an optional discount to the one-time fee. Apply the following settings for the discount:
- Choose the Category for the discount from the drop-down menu.
- Select if the discount is a flat Amount or a Percentage of the overall fee, then set the discount amount.
- Add an optional Description for the discount.
- Click Next, then review the one-time fee before clicking Complete Fee.
 > Add One-Time Fee.

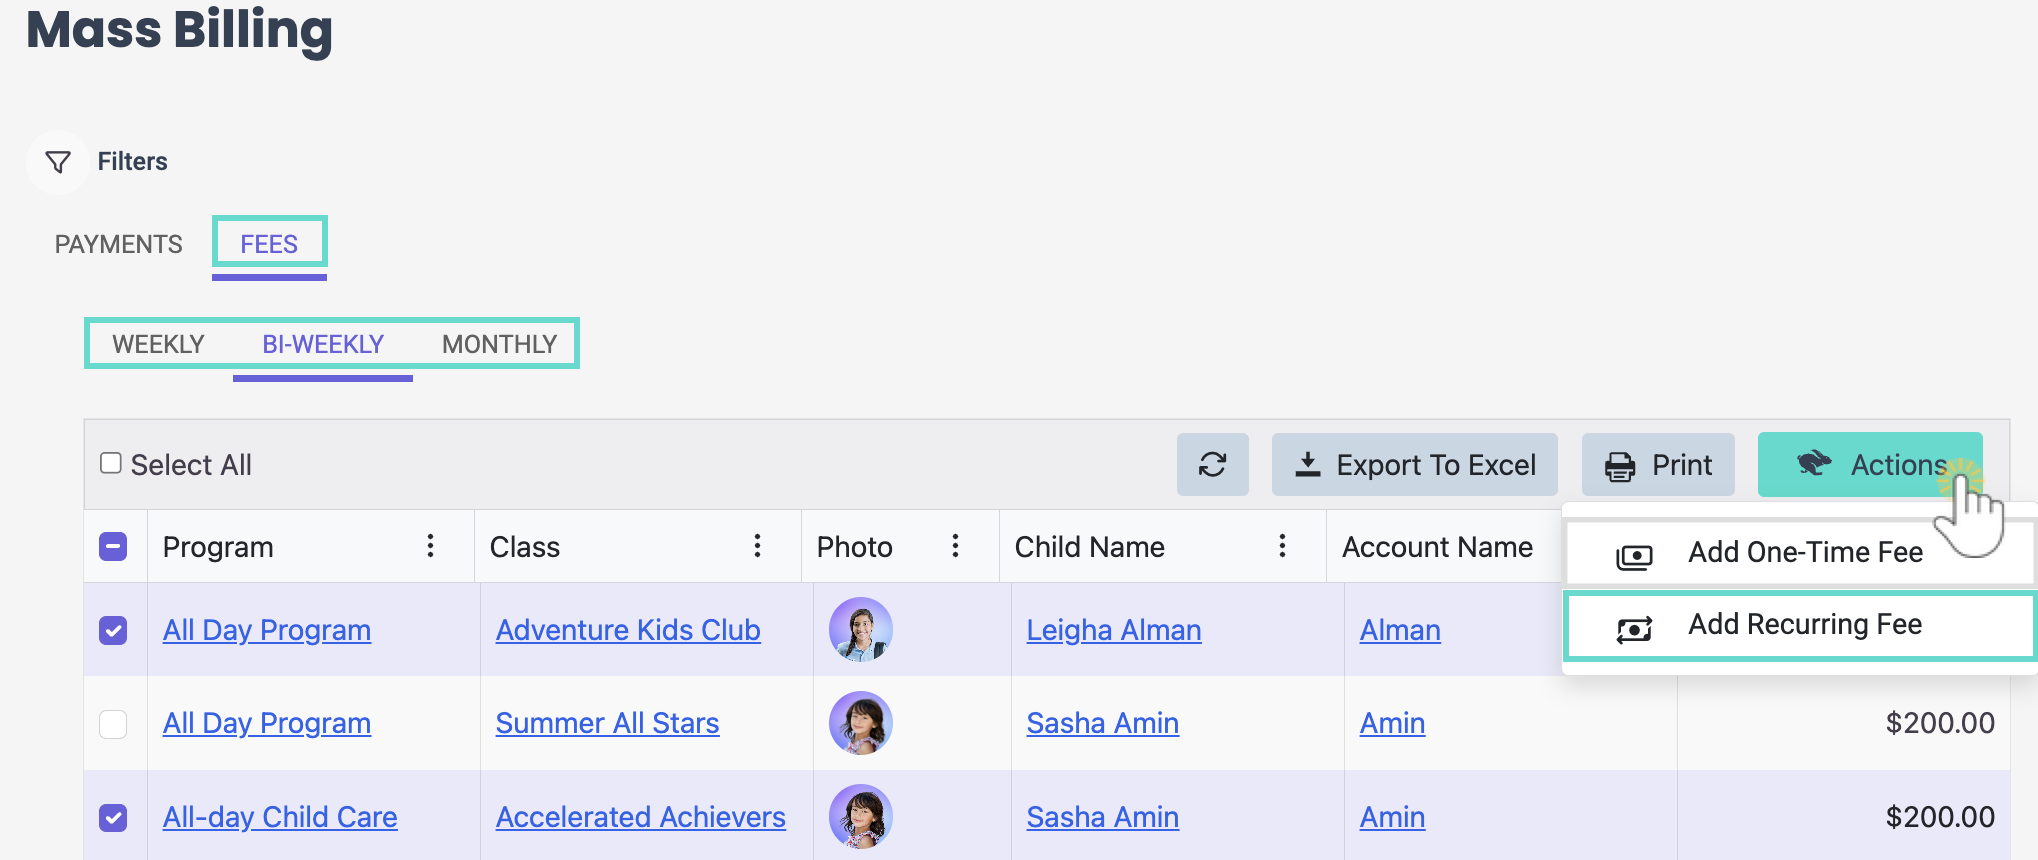
Add Recurring Fees
Add a recurring fee to one or more families by doing the following:
- Go to the Fees tab, then select the families using the checkboxes on the left, or click Select All to choose all accounts.
- Click the Actions menu> Add Recurring Fee.
- Select a Category from the drop-down menu or use the +New Fee Category button. Then, enter the Recurring Fee Amount, add an optional Description, and click Next.
- Select the Billing start date and use the toggle to select a Billing end date if you would like the fee to end on a specific date in the future, then click Next.
- Use the toggle to apply an optional discount to the recurring fee. Apply the following settings for the discount:
- Choose the Discount Type from the drop-down menu.
- Choose the Category for the discount from the drop-down menu.
- Select if the discount is a flat Amount or a Percentage of the overall fee, then set the discount amount.
- Add an optional Description for the discount.
- Click Next, then review the recurring fee before clicking Complete Fee.

