Spaces are the physical locations or rooms at your facility where children attend classes. Every space should be set up in the Jackrabbit Care system and assigned to a class once the class has been created.
Owners and Administrators automatically have permission to set up Spaces; however, an Administrator is limited to creating them for the site(s) assigned when they were added as a Team Member.
Create a Space
Spaces and their details are created and maintained at the site level. For centers with multiple sites, ensure the right site is selected at the top of the page.
- Go to Settings (left menu) > Site Settings card > Manage All # Spaces.
- Click the Actions Menu
 > Create a space.
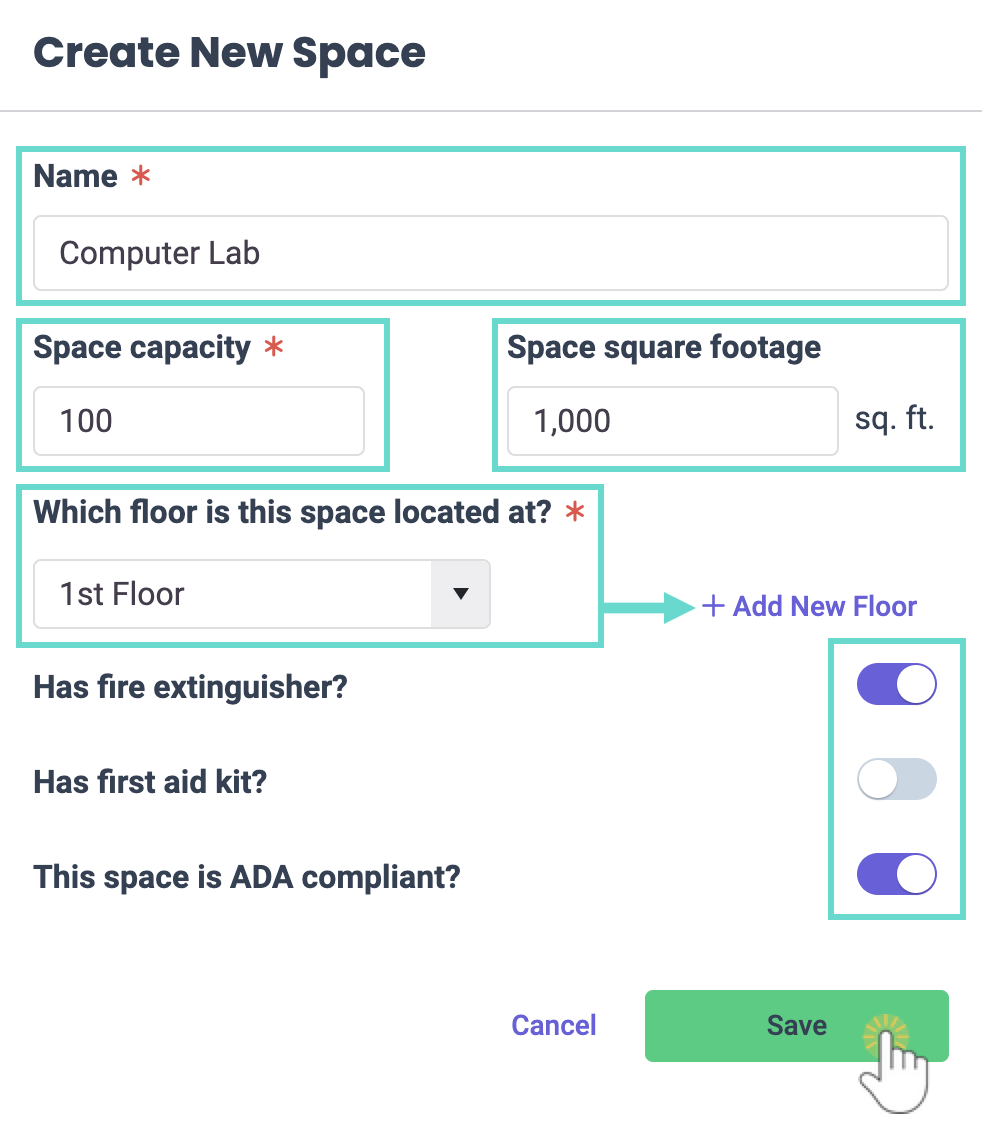
 - Add details in the Create New Space window before clicking Save:
- Name - Label the space.
- Space capacity - How many people the space can accomodate.
- Space square footage - How large the space is.
- Which floor is this space located at? - Use the dropdown menu or click "+ Add New Floor".
- Has fire extinguisher? - Enable the toggle if the space has a fire extinguisher located within it.
- Has first aid kit? - Enable the toggle if the space has a first aid kit located within it.
- This space is ADA compliant? - Enable the toggle if the space meets the accessibility standards of the Americans with Disabilities Act.

Add a Space to a Class
After Spaces have been created, they can be added to classes. Locate the class you want to add a space to.
- Go to Programs & Classes (left menu) > Programs & Schedules card > View All Classes.
- Click Details on the class card you want to add the Space to.
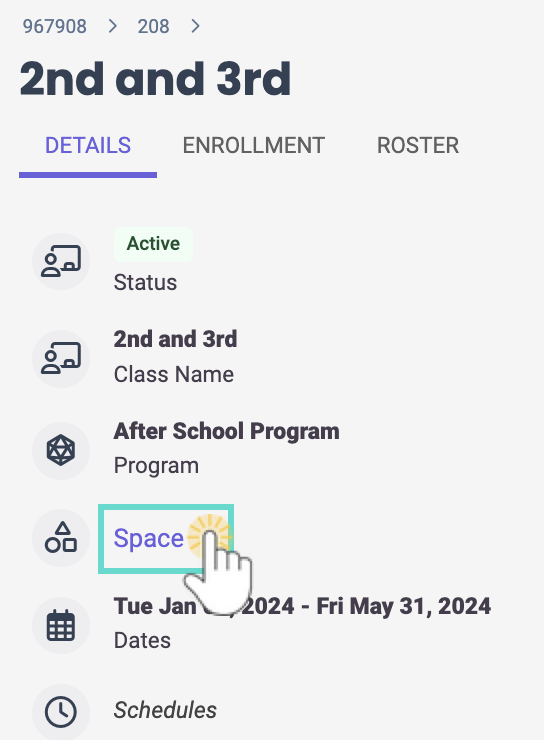
- Click the Space link under the Details tab.

- Select the Space from the drop-down menu or click + NEW to add a new space to the site.
- Click Save. The space is immediately added to the class. This designated space can be changed as often as needed.

Delete a Space
Spaces with no classes assigned to them can be deleted. If a space has classes assigned to it, assign the class a new space first, then proceed with deleting an unused space:
- Go to Settings (left menu) > Site Settings card > Manage All # Spaces.
- Find the space you want to delete.
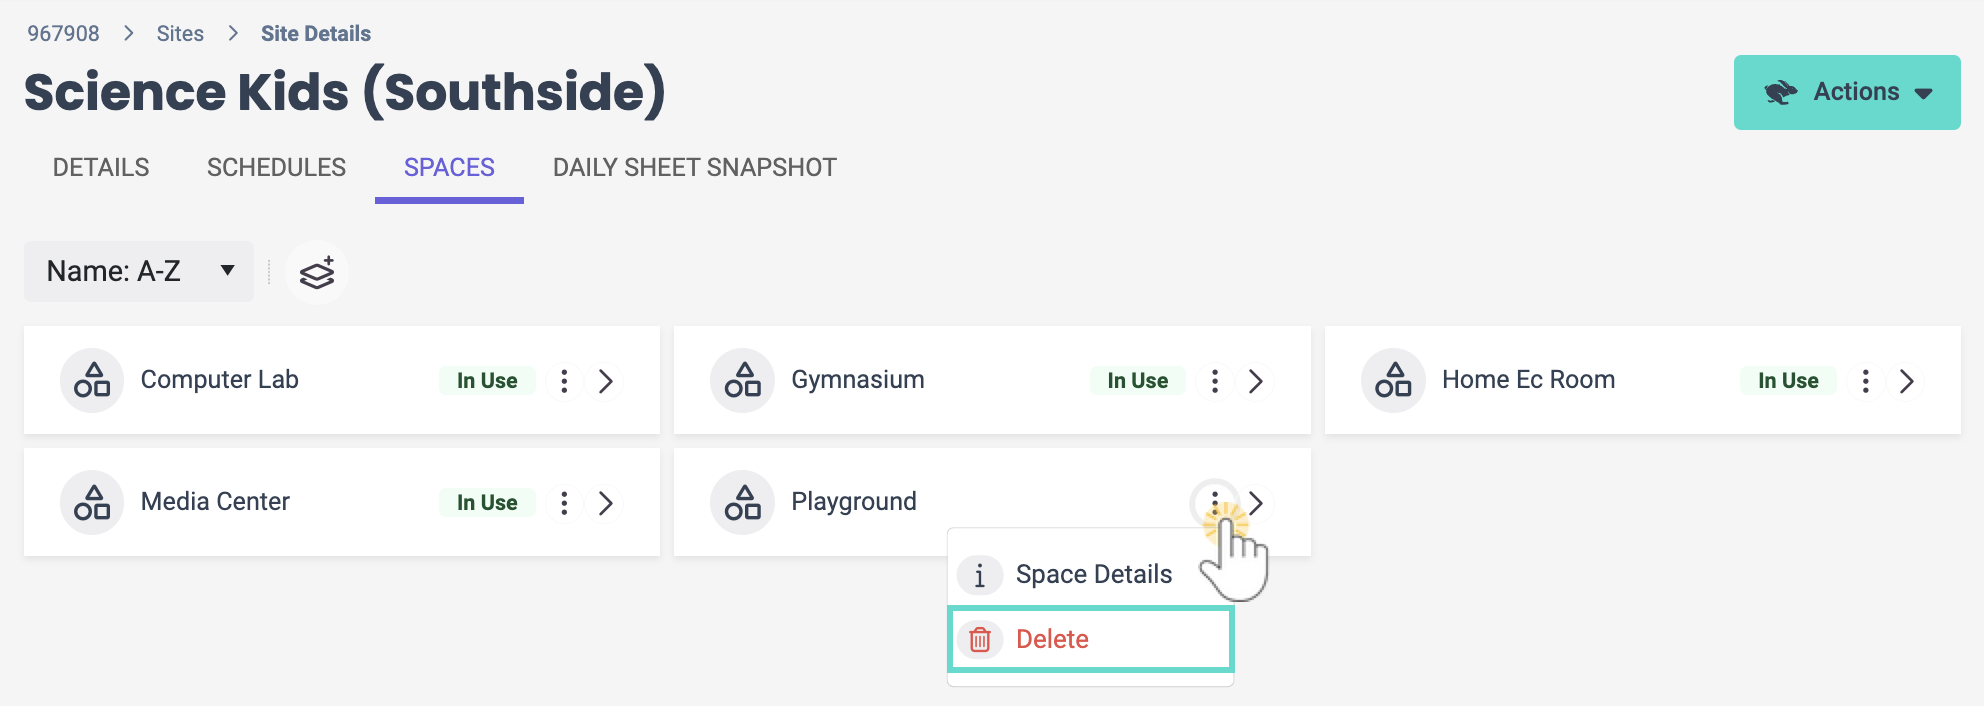
- Click the Options icon
 > Delete on the space card.
- Click Delete in the Delete window to confirm changes.
 > Create a space.


