Whether you have a childcare center with a single program or a larger multiple-program center with different locations, Jackrabbit Care makes the process of registering families quick and easy.
With an Online Registration form, you can:
- Collect basic information and documents ahead of approving the registration for enrollment.
- Add files, policies, or other information for caregivers to include or require signatures for.
- Request accessibility needs information for children prior to registration.
- Set up different enrollment periods for new families and returning and existing families.
Follow these 4 steps to prepare and set up an Online Registration form for your programs.
Step 1 - Create Policies
It is important to create policies related to your business and the programs you offer. To work with your policies, go to Settings (left menu) > Business Settings card > Manage Policies.
- Create the policies first, and add them in Step 4 below.
New policies can also be created and added when setting up an Online Registration form in the Required Steps window.
Step 2 - Create Document File Types
A File Type must be created before you can add them to the Online Registration form. New file types are located under Medical & Compliance (left menu) > Documents card > Manage Files Types.
- Create the File Types first and add them in Step 4 below.
New Files and Documents can also be created and added when setting up an Online Registration form in the Required Steps window.
Step 3 - Add Program Descriptions
The information you share about the program will be displayed to caregivers on the Online Registration form. Add or update a Program Description by going to Programs & Classes (left menu) > Programs & Schedules card > View All Programs.
- Click the Program card > Program Description.
- Enter a description for your Program.
- Click Save.

Step 4 - Set Up an Online Registration Form
An Online Registration form can be created from Enrollment (left menu) or Programs & Classes (left menu). Follow these steps to create an Online Registration form for each of your programs.
From Enrollment (Left Menu)
- Go to Enrollment (left menu) > Online Registration card > Manage Online Registration.
- Click the + New Settings button to open the Set Up Online Registration window and start the Required Steps workflow.
From the View All Programs Link
- Go to Programs & Classes (left menu) > Programs & Schedules card > View All Programs.
- Click a program card to open the Details tab.
- Go to Actions menu
 > Set Up Online Registration to open the Set Up Online Registration window and start the Required Steps workflow.
Complete the Required Steps Workflow
- Use the toggles on the right to Allow New Families or Allow Returning and Existing Families to register.
- Enter the Open Date and Close Date for the Registration Period and click Next.
Note: Registration periods may differ or overlap for New Families and Returning and Existing Families, allowing for returning and existing families to register before new families.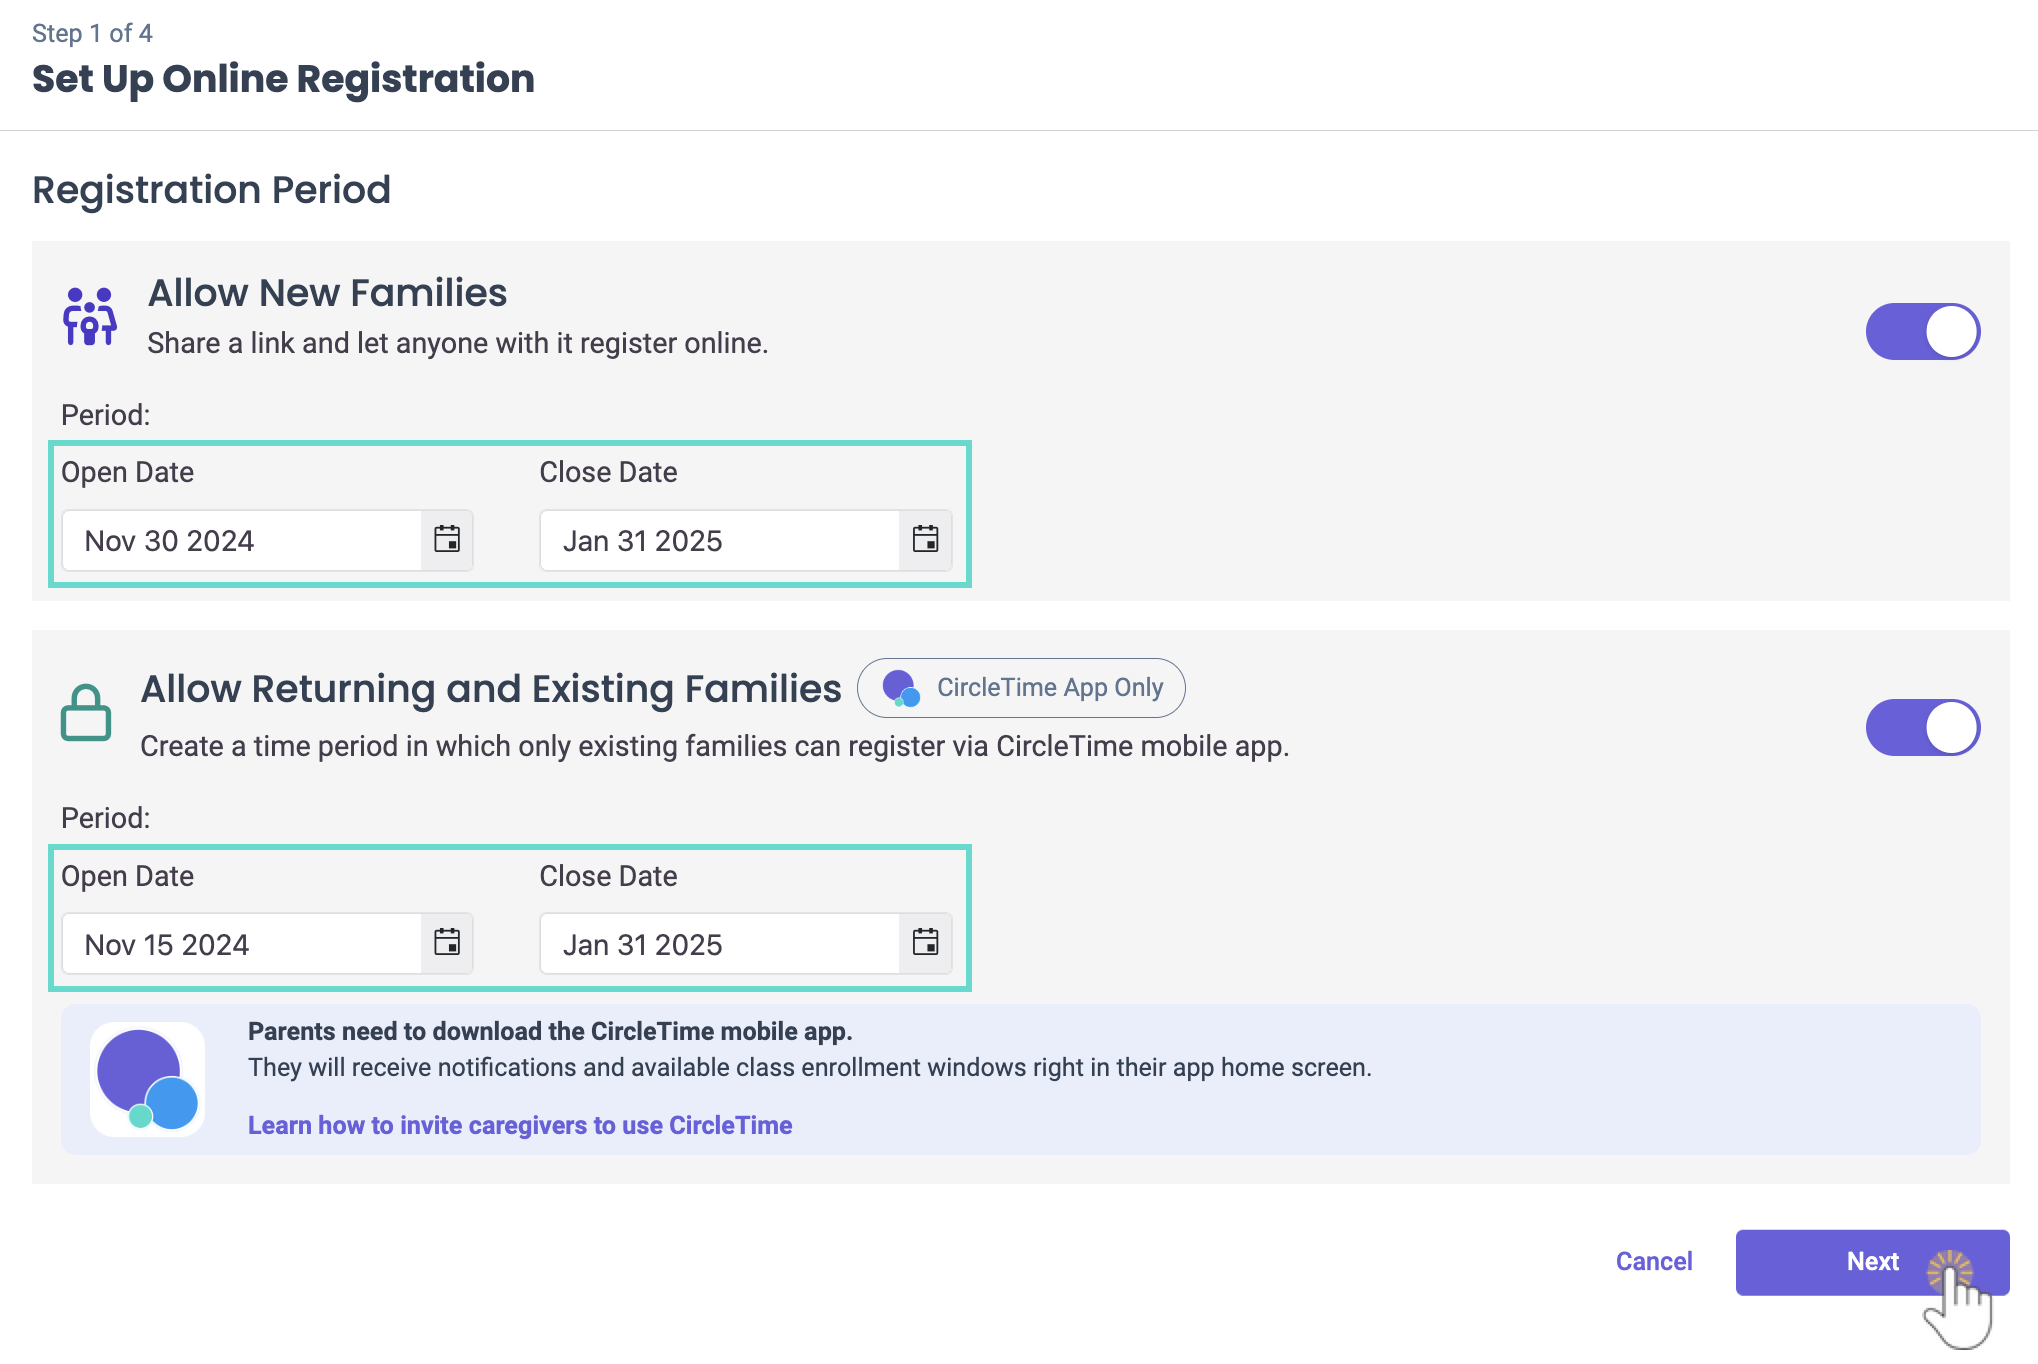
- Click + Add Step to add additional required information for Registration or Enrollment, then click Next. Caregiver Information and Child Information are defaults and listed automatically. Optional steps include:
- Files and Documents—Select the checkbox if the file is mandatory. The attached file types must be PDFs or JPGs and less than 10 MB.
- Policies - Select the policies that need to be reviewed and accepted by families.
- Additional Contacts - Choose which additional contact information is required and the minimum number of emergency contacts.
- Accessibility - Choose the term you would like to use when asking a family about a child's additional needs. When filling out an online registration form, families are given a blank space to provide more information about their child's accessibility accommodations.
- Payment Method Information - If using ePayments, this option is available to request the primary contact put a primary payment method on their account prior to enrollment.
- Immunizations - Parents and contacts can enter their child's immunization status when registering through CircleTime.
- Custom Questions - Add mandatory or optional Custom Questions for families to answer.
- Allergies - Request families upload documentation supporting their child's allergy status.
- One-Time Fee - When Jackrabbit Pay is enabled at your center, charge returning families a one-time enrollment fee.
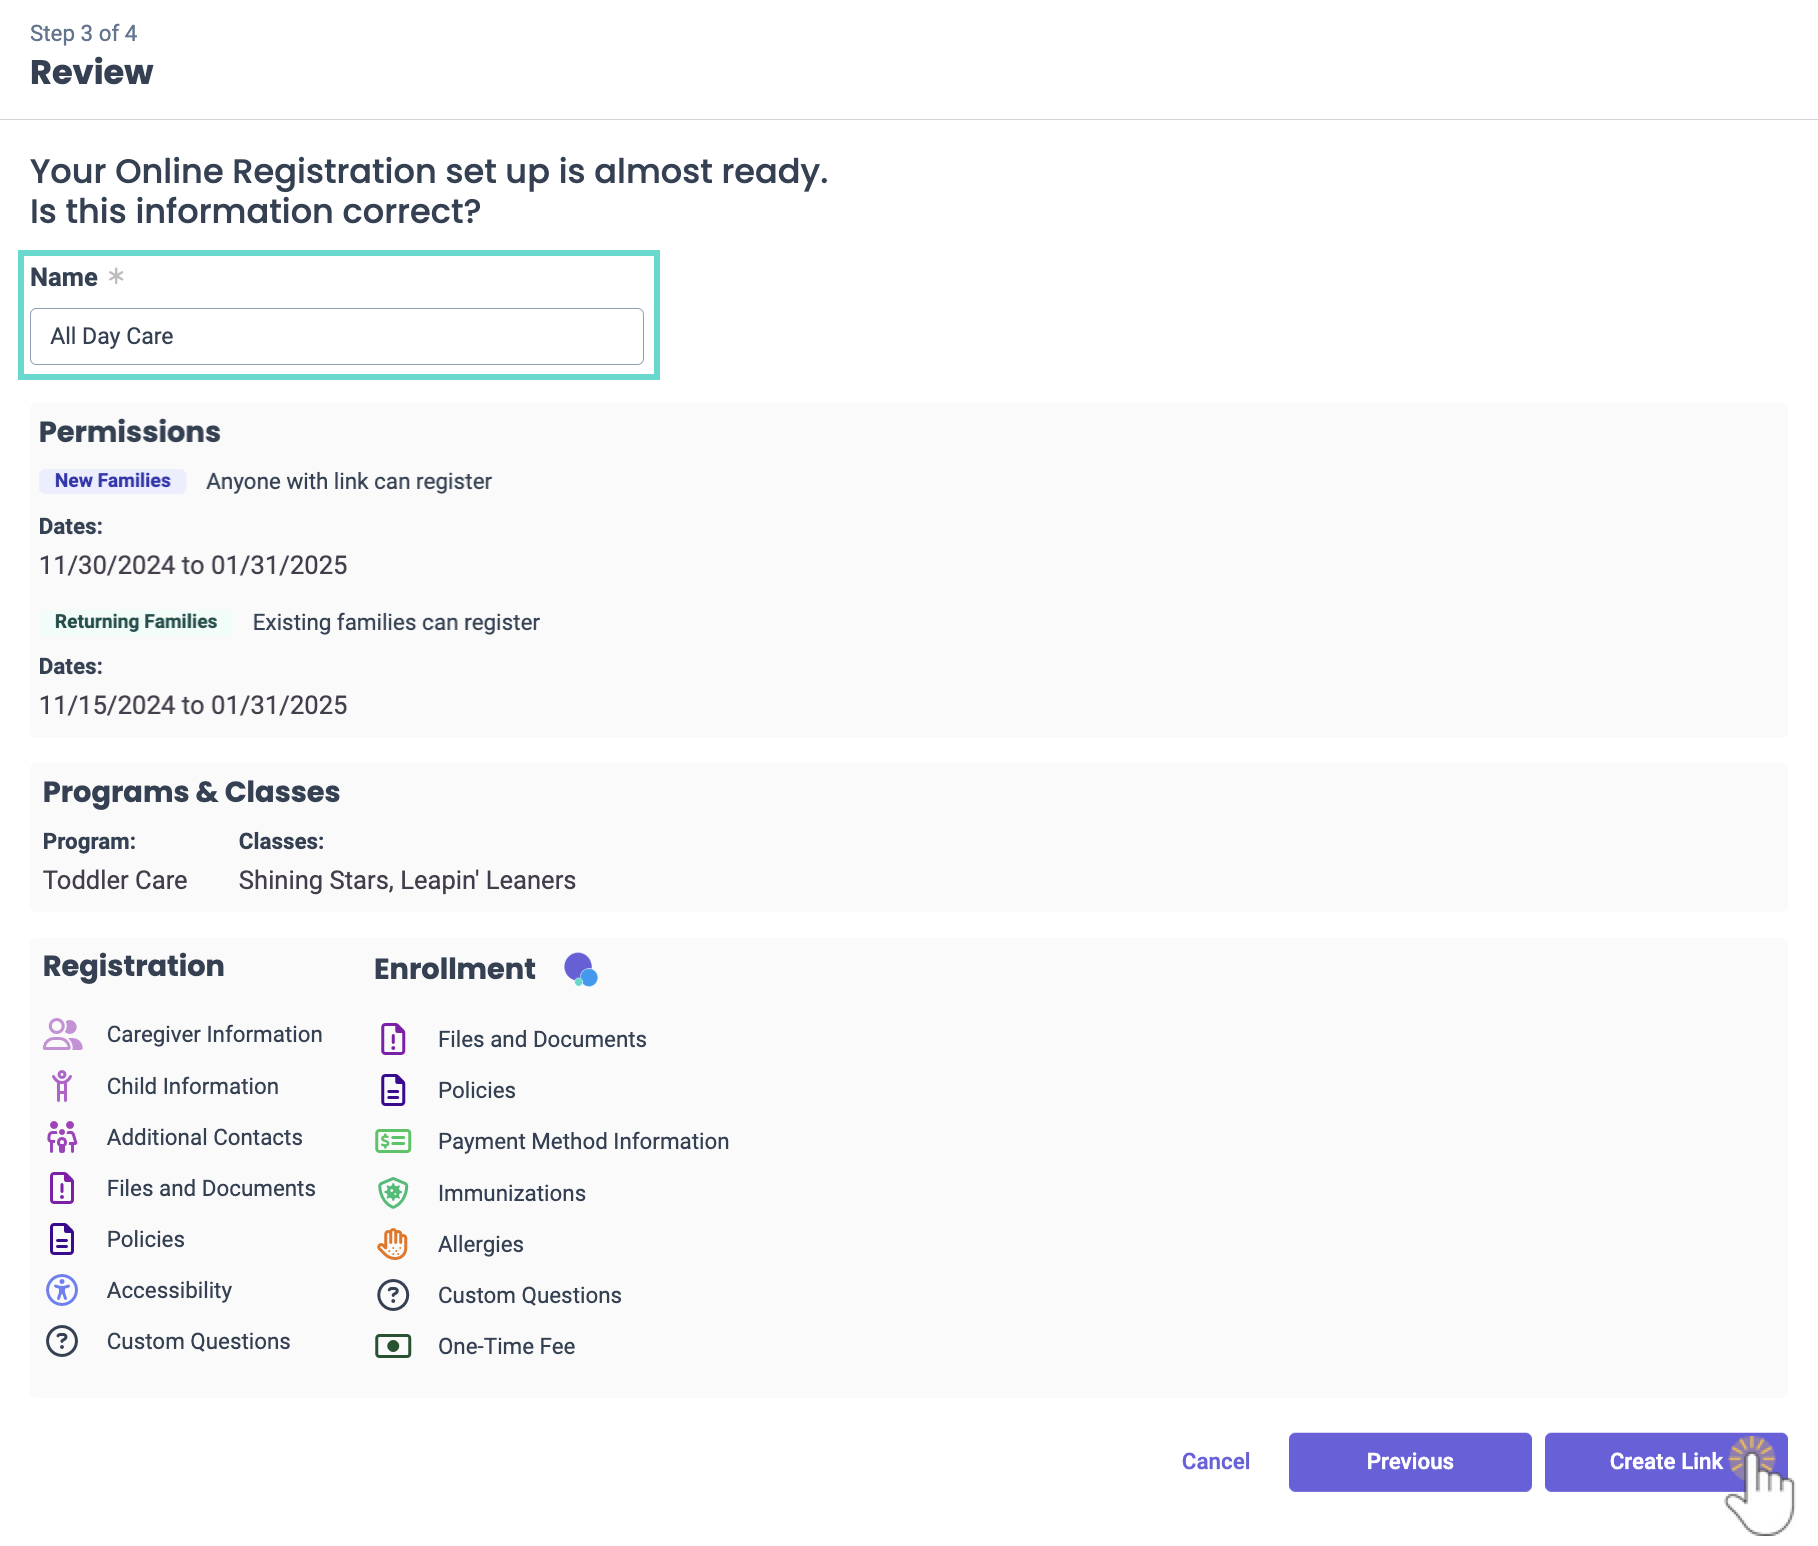
- Add and review all information and click Create Link :
- Add a Name (required) for the Online Registration form. The name for this registration form will be displayed on the Online Registration Settings page.
- Review all the information to be included in the form.
- Return to a previous step if you need to make changes.
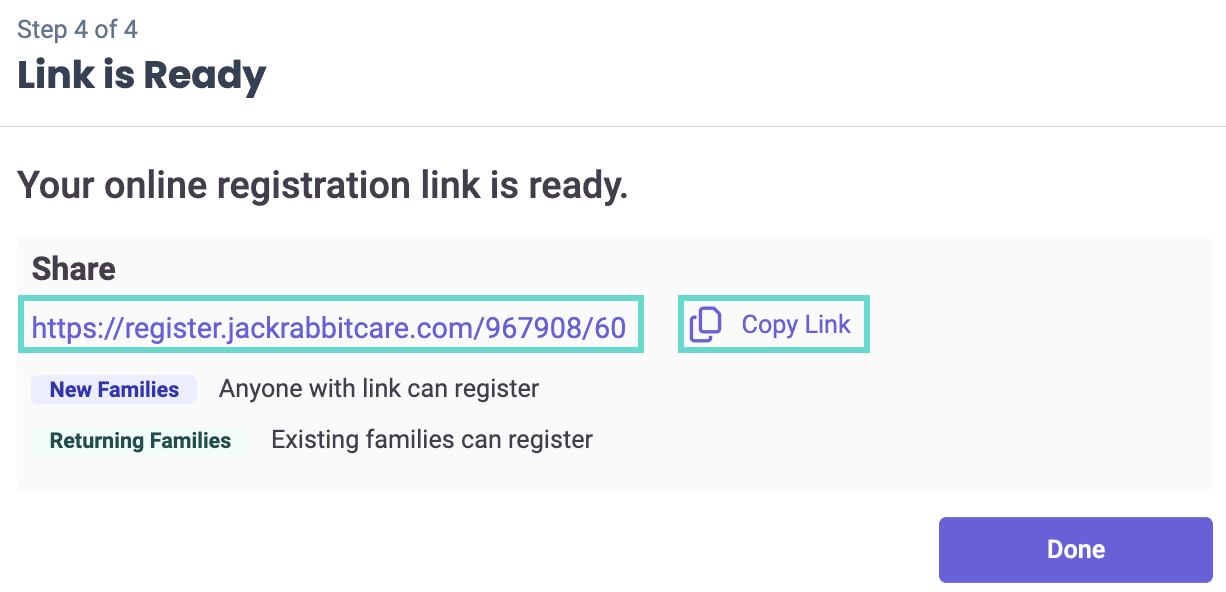
- Click Copy Link, or copy and paste the URL to share and send out the Online Registration form to families who have expressed interest in registering their child in your program.
- You can also use the online registration link to create an action button on your website.
- You can also use the online registration link to create an action button on your website.


Easily copy the link in the future by going to Enrollment (left menu) > Online Registration card > Manage Online Registration > Actions menu > Copy Center Registration Link.
Modify an Existing Online Registration Form
If you want to edit an existing form, follow these steps to make changes:
- Go to Enrollment (left menu) > Online Registration card > Manage Online Registration and locate the specific Program card to edit.
- Click Details on the Program card.
- Click the Edit button
 to open the Set Up Online Registration page.
 - Step through the workflow and make the changes, which may include:
- Open Date and Close Date for registration.
- Modify Caregiver Information and/or Child Information.
- Add additional steps to the registration form.
Sample Online Registration Form
Here is an example of an Online Registration form families will see when they use the link generated above. They will choose a site before clicking Start My Registration.

When registering multiple children, their experience will look similar to below. After selecting a program for a child, they may choose to use the following features:
- Click Register another child to add another registration before submitting their registrations to your organization.
- Use the drop-down menu, which shows many registrations they have filled out, to see their registration details.
- Click the Trash icon
 to remove a registration.
 - Click Continue or Review and Submit to finish any final steps, such as adding additional contacts, before completing the registration process.
 to remove a registration.
Parent's Online Registration Video
Watch this short video to see the parent's experience with the Online Registration form.
If your families are registering through CircleTime, you can also send them this link to help with the process.
Review & Process Online Registration Forms as the next steps for Online Registration!
